Are you a contractor wowing potential clients with image galleries of your work or a homeowner taking shots of your proudest DIY hardscape projects? Capture the best possible images with your smart phone and prevent messy surroundings, bad lighting and tough angles from ruining photos of your gorgeous, finished projects. Here we’ll examine key considerations, settings and details of how to capture beautiful hardscape photos:
- Smart Phone Camera Settings for Photographing Hardscape Projects
- Beware of Photo Surroundings & Backgrounds
- Like Project Management, Timing is Everything
- Capturing and Framing Neat Hardscape Photos
- Cropping, Editing and Saving Images
Let’s zoom in on some of the challenges and solutions when taking photos of retaining walls and other hardscape projects!


Smart Phone Camera Settings for Photographing Hardscape Projects
First thing’s first – let’s discuss simple adjustments to your smart phone’s camera settings. This will make hardscape photos easier to take without the hassle of fumbling with buttons. Under your phone’s Camera settings, turn on the “Grid” option, which will add a light grid to your camera, making it easier to keep photos straight and aligned.
For ease of use, turn HDR options to Automatic and turn off Flash options. Notably, the “Selfie Mode” (camera facing the phone user) is a lower quality camera, so remember to always take photos from the camera on the back of your phone. To center on certain details or sections of your project, zoom in and out or touch the screen area of the camera where you want the lens to focus. Pressing on that area will help your camera auto-focus for a few seconds while you take the perfect image.


Be Aware of Photo Surroundings & Backgrounds
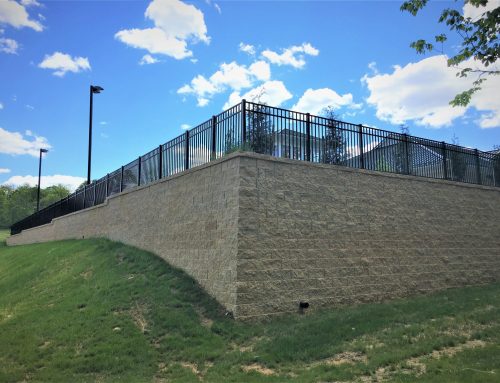
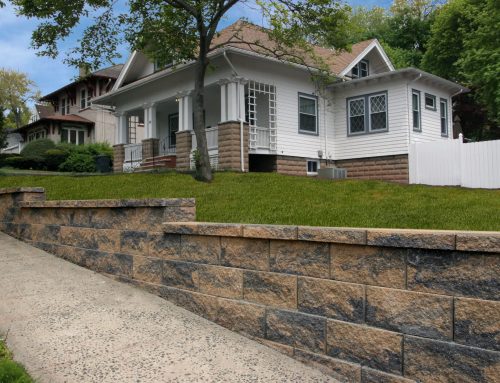
Next, be aware of undesirable backgrounds and busy settings for your photos. While you focus on a beautiful, terraced CornerStone 100 retaining wall with a built-in staircase and raised gardens, the commercial site’s portable bathrooms or neon yellow trucks in the background can be distracting.
Consider that less can sometimes be more. Zoom in on a particular hardscape features – a block, section of retaining wall – not a zoomed out photo of the entire site. Those full-site shots can accidentally have people walking through the frame or show piles of scrap materials and garbage that’s awaiting removal.
Finally, always ask permission when taking photos of people at your project site and refrain from photographing private or confidential information.
- Watch reflections in glass windows/mirrors – these can show unintended background scenery
- Target bright, blue sky days for an attractive aesthetic instead of overcast, dreary conditions
- Focus on particular aspects of a hardscape project to not overwhelm viewers with busy photos
- For contractors, landscaped photos help customers envision hardscaping their property
- Only take photos when it’s safe to do so, from safe areas


Like Project Management, Timing is Everything
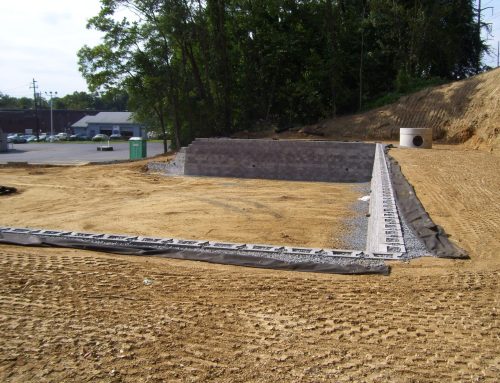
Timing and image comparison are powerful tools. To emphasize the boosted aesthetics and functional performance of your hardscape project, take before-and-after shots from similar locations and angles. For contractors, this provides more context for potential clients when it comes to visualizing projects.
Strategically selecting the timing of photos at construction sites will also help you achieve better quality photos. Arrive at site before other employees or stay late for quiet time with minimal delays and distractions. This will allow you to focus on the photos without being startled by sounds of booming heavy equipment or playful behaviors of employees on-site. The perfect hardscape picture awaits!
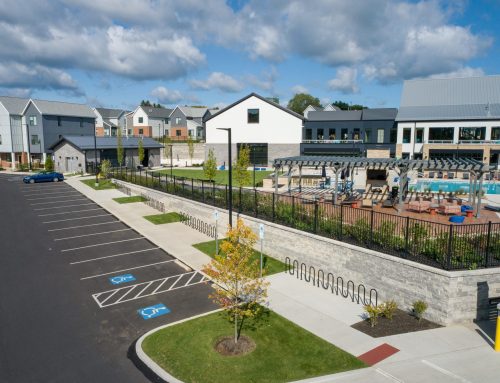
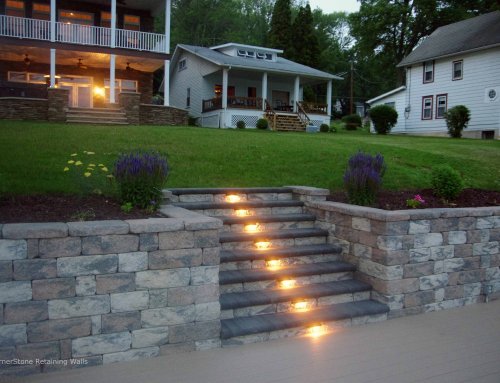
For CornerStone 100 retaining walls, the landscape transformation can be absolutely breathtaking. Especially when before-and-afters show how retaining walls can turn a steep hillside or derelict property into a gorgeous dreamscape or profitable commercial land. It’s true that pictures say a thousand words.
- Before-and-afters pack a major visual punch and convey a lot of information
- Early morning or late afternoon is best timing, minimizes shadows and glares of direct sunlight
- For installation photos, be on-site before or after employees for less disturbances and delays
- Taking photos throughout the project gives contractors proof of quality assurance


Capturing and Framing Neat Hardscape Photos
All contractors and DIYers know the importance of exact measurements – especially angles. So go ahead and snap as many shots as needed to find the right angle that shows off your project. It’s easy to delete multiples from your smart phone, so having more choices from different angles is often a huge help. We recommend using the age-old “Rule of Thirds” when framing your photos, read more about this technique here.
Take advantage of opportunities to find uncommon angles from lifts or drones above the construction site. For contractors installing 30 ft. (9.14 m.) tall CornerStone retaining walls, aerial shots effectively convey wall heights. They also emphasize the retaining wall’s unique features like flowy curves, scenic backdrops or active loads supported behind the wall.
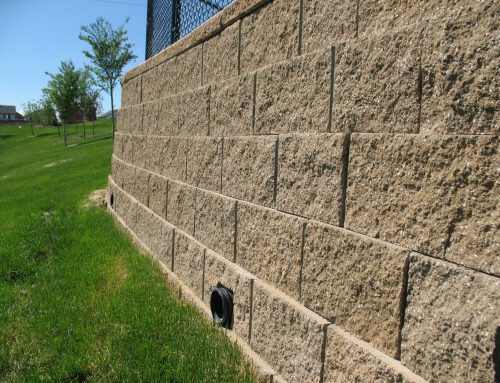
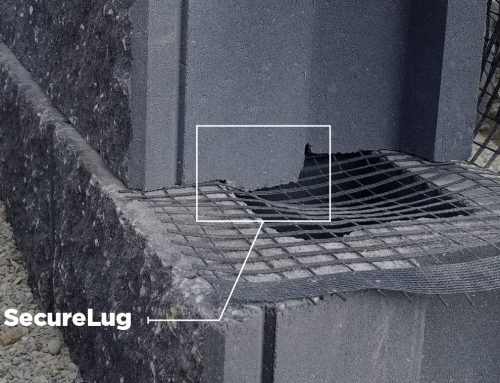
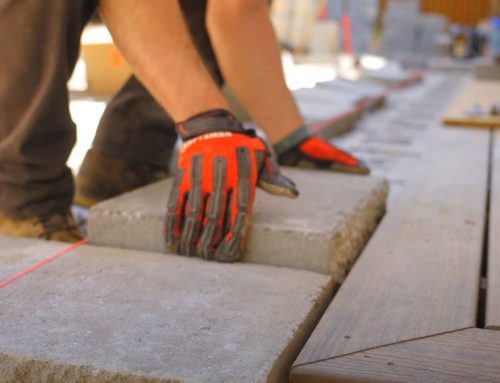
Focus on specific areas like a concrete block’s textures for more in-depth visuals. A retaining walls’ under-cap hardscape lighting, drainage channels and multi-purpose versatility for pillars, columns and staircases are perfect examples.
- Always make your hardscape project prominent in the frame of your camera
- Take photos from a mixture of angles – high, low, from the side and directly from the front
- New angles and perspectives can efficiently capture the full scope and complexity of projects
- Watch for neat moments, little details and cool features that are unique to your project


Cropping, Editing and Saving Images
Luckily for those who struggle with taking photos, modern smart phones all come with filters options, plus the capabilities to crop and edit photos after taking them. These features can help balance a tilted image that’s tilted too far to the side or accentuate the colors your camera just couldn’t quite capture.
A free time-saving tip? Purposefully zoom in and out to eliminate objects from the photo that you know it will look better without. The Tilt and Swing editing features on smart phones can work wonders in the edit settings afterward. However, things to proactively avoid when taking photos include messy foregrounds of mud and tools, or garbage and debris around your hardscape project. A clean, framed image is an unbeatable combination.
Finally, be sure to save and store your photos on hard drives, then organize your image folders by project name or date. This will help you locate and retrieve photos quickly and easily in the future!
- Do as much cropping as possible in the moment when taking photos to save time
- Post-photo enhancements (filters and cropping) can help remove shadows and fine-tune images
- Final touch-ups with Sharpness and Definition settings can go a long way
- Ensure you save and organize photos to easily locate them in the future
Find your nearest CornerStone dealer today, or check out our installation resources for step-by-step guides on how to build these beautiful retaining wall systems!


Photos: Mutual Materials, York Building Products, LibertyStone Hardscaping, Adams Oldcastle, Boxley Hardscapes