Crafted Workshop Features CornerStone 100 Retaining Wall
DIY projects can be rewarding, but also challenging for home renovations and retaining wall projects. People want affordability and profitability while improving property value and appearance. Safety and proper planning are crucial for successful DIY retaining wall projects. CornerStone Wall Solutions Inc., partners Crafted Workshop for their (Not So) Tiny House Project.
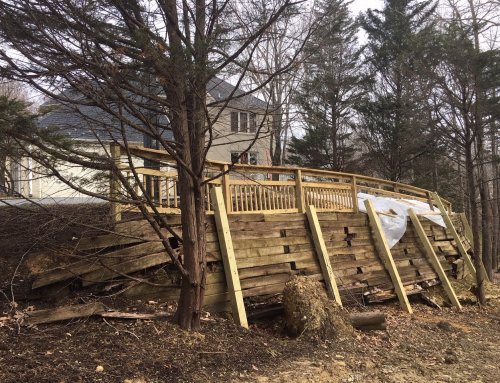
Join us as we explore Crafted Workshop’s improvement of their raised patio retaining wall!


Collaborating on Raised Patio with Crafted Workshop
Crafted Workshop provides weekly how-to demonstration videos for a vast array of DIY projects. These include woodworking, metalworking, and home renovations. These step-by-step videos show the complete journey of DIY projects, from the planning and design phase to completion. Each video includes tips, tricks, and obstacles encountered along the way.
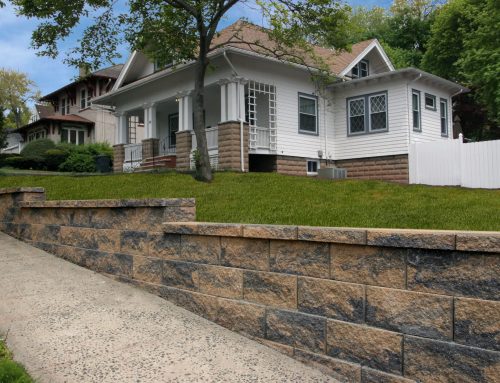
In 2020, Crafted Workshop’s owner Johnny Brooke began building a guesthouse in his Asheville, NC backyard. He aptly named this the (Not So) Tiny House project. As part of the design, a raised patio retaining wall and firepit would be installed along the sloping backyard in front of the guesthouse. Crafted Workshop selected CornerStone 100 retaining wall blocks. This is because of the system’s easy installation and versatile reputation. The retaining wall’s purpose for this project is to support the paver patio and provide secure, long-lasting earth retention. Check out the full video here:
Starting Retaining Walls with Graded Base Elevations
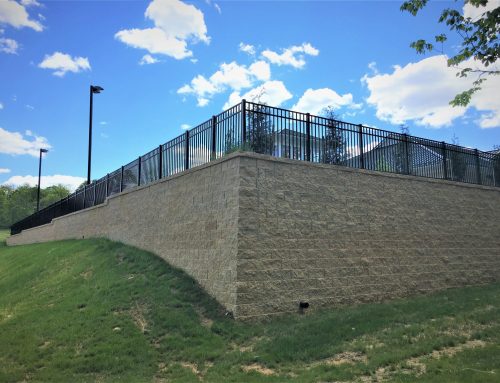
Crafted Workshop chose a gravity retaining wall. This is because the minimal load and low elevation height, the paver patio, did not need further geogrid reinforcement. Gravity retaining walls are commonly the easiest type of retaining wall to build. Notwithstanding each design’s unique challenges.
Johnny was well-prepared for this project, using CornerStone Wall Solution’s resources. This process included consulting with his architect, Rick Kazebee. Together, they mapped out the specifics of the design with CornerStone’s Retaining Wall Design & Analysis Software. CornerStone’s Wall Estimator helped determine the number of materials and CornerStone 100 needed. This software can save you massive time and money throughout the design phase.
Crafted Workshop ordered the CornerStone 100 wall blocks from CornerStone manufacturer, Adams Oldcastle. Adams Oldcastle conveniently distributes CornerStone 100 across North Carolina and South Carolina. Find your nearest CornerStone dealer to learn more or to ask their retaining wall experts any questions you may encounter.


DIY CornerStone 100 Raised Patio Experience
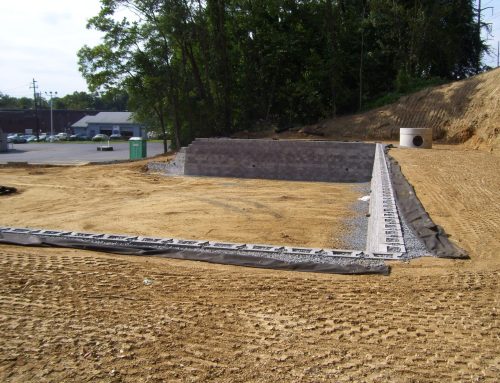
Getting started on a small retaining wall like this in your sloped backyard can be a daunting task. After all, the quality of the base leveling pad is often reflected and affects the rest of the retaining wall. Crafted Workshop used the free step-by-step CornerStone 100 How-To Documents and Installation Guide.
Footage of Retaining Wall Construction
Crafted Workshop’s full video showcases how the CornerStone 100 retaining wall was built, from start to finish. Johnny and his crew were first-time users of the retaining wall system and learned a ton from CornerStone’s online resources. To see how Crafted Workshop approached different phases of the paver patio’s retaining wall, view the video links below:
- Planning & Excavation – (1:05m)
- Base Compacting, Materials & Leveling Pad – (3:00m)
- Laying the First Course on Base Leveling Pad – (6:35m)
- Additional Retaining Wall Courses & Corners – (9:37m)
- Installing Drainpipes & Drainage Outlets – (10:25m)
- Backfilling Behind the Retaining Wall – (12:56m)
- Base Elevation Changes & Step-Ups – (14:40m)
- Fill Material and Retaining Wall Caps – (17:00m)
- Installing Hardscape Lighting Under Caps (18:15m)


*CornerStone 100 corner block shapes may vary by region.
Helpful Retaining Wall Tips & Tricks
During the CornerStone 100 installation, Crafted Workshop found several creative and inexpensive techniques. These saved their time and kept costs minimal. Below are a few recommendations to make the installation process smooth for your DIY retaining wall and where they can be found in the video.
Tools
Rotary Laser. The Rotary laser was one tool the team absolutely loved for this project. Its 360° laser line maintained an even level to assist in measuring heights and depths – essential for keeping the base pad level. (1:15m)
Screeding. The team was able to save costs on a commercial screed board by using a leftover piece of 2×4 lumber. Using it and ¾” EMT conduit as screed rails made for effective makeshift screeding tools. (5:30m)
Corner Adhesive. Outside corners of retaining walls are notoriously the weakest part of a retaining wall due to the loads and pressures above. Reinforce the corners with heavy-duty adhesive for peace of mind. (10:00)
Cut-Off Saws. Each design is different, so the measurements will be too. From time to time, cutting the retaining wall blocks will be necessary. If possible, select a cut-off saw to hook a garden hose. This will significantly reduce dust flying up when cutting blocks. (10:35m) (15:53m) (18:40m)
Mason Chisel. Avoid injuries to your hands and fingers by selecting a chisel with a hand guard. Even the best installers miss a hammer swing sometimes. This will come in handy when making drainage holes in the wall blocks. (10:55m)
Caulking Gun. The Crafted Workshop team were skeptical of this tool. However, it was super useful when the project rolled around to securing the cap units to the top course of blocks. (18:00m)
Measurements
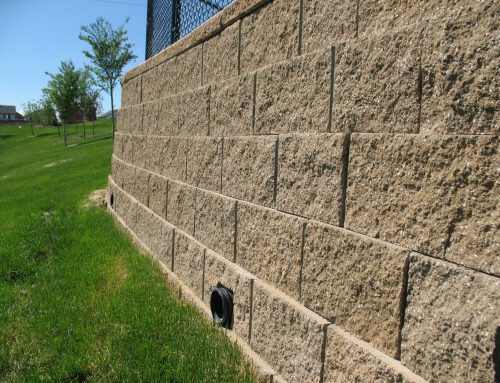
String lines. Placing a string line along the back face of the retaining wall blocks as a measurement guideline is an old trick. This is because CornerStone’s precast retaining wall blocks will consistently be the same size. Be sure to place string lines behind the blocks, as the front facing can vary due to its rugged, natural stone textures. (6:50m)
Leveling. The base course will set your retaining wall up for success if built properly and potential disaster if built haphazardly. Always double-check the leveling of your base course, it’s arguably the most important aspect of your retaining wall. (9:00m)
3D Modeling Software
SketchUp. Gaining a visual of what you’re planning to build always helps decision making and implementing final tweaks to make the project perfect. SketchUp is an excellent resource. (2:55m)
Features
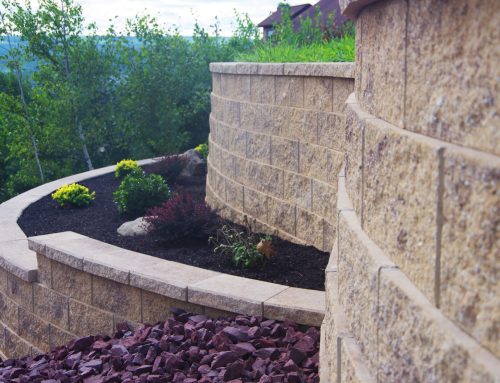
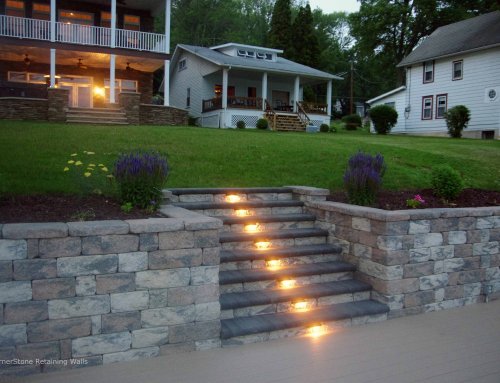
Hardscape Lighting. Adding LED lights beneath the caps of your retaining wall increases safety so people don’t trip over the retaining wall. These neat lights look excellent in the evening and tuck away nicely out of sight under the cap units.


Thanks to Crafted Workshop!
CornerStone Wall Solutions is proud to be part of Crafted Workshop’s (Not So) Tiny House Project and their raised patio retaining wall. The How-To’s they create showcase practical challenges and solutions for each project. This is all thanks to their exceptional combination of skill and resourcefulness.
Crafted Workshop’s safety-first approach is an exemplary model to follow. And this is why CornerStone Wall Solutions happily partnered with Johnny and his hard-working team. Special thanks to the Crafted Workshop crew for explaining each step of construction in simple, engaging ways. A huge thanks goes to Adams Oldcastle for producing high-quality CornerStone wall products. His contribution is greatly appreciated.
CornerStone will be collaborating with Johnny again soon to build stairs on each side of the guesthouse’s beautiful paver patio. That project will still use CornerStone 100 retaining wall blocks. Stay tuned and subscribe to Crafted Workshop on YouTube to follow the (Not So) Tiny House Project and learn more!


Follow Crafted Workshop’s social media pages for updates on the (Not So) Tiny House’s progress and more DIY projects:
Instagram: @CraftedWorkshop YouTube: Crafted Workshop Facebook: Crafted Workshop
Ready to build your own retaining wall with CornerStone 100 blocks? Contact us today to get started on your project! Our team of experts is here to help you design and install your dream outdoor space. Let’s bring your vision to life with CornerStone 100!