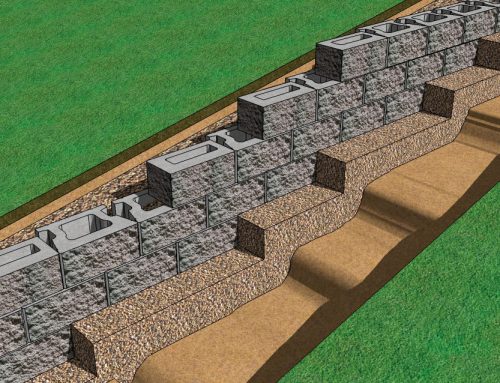
Base elevation changes are often required and can be problematic if not planned properly. Correct construction and professional completion of these wall details greatly enhances the visual appeal of the finished project and avoids the time and costs associated with improper installation. This document provides illustrated step-by-step instructions for integrating base elevation changes.
![]()
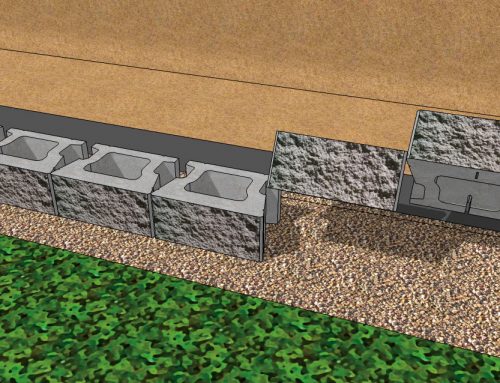
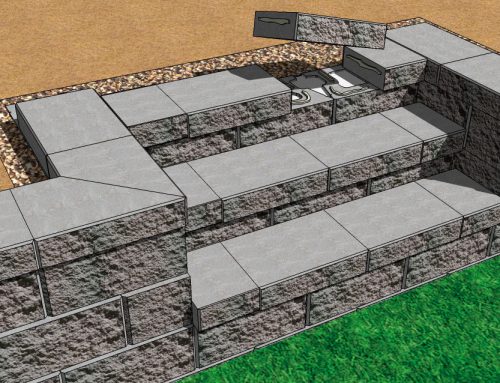
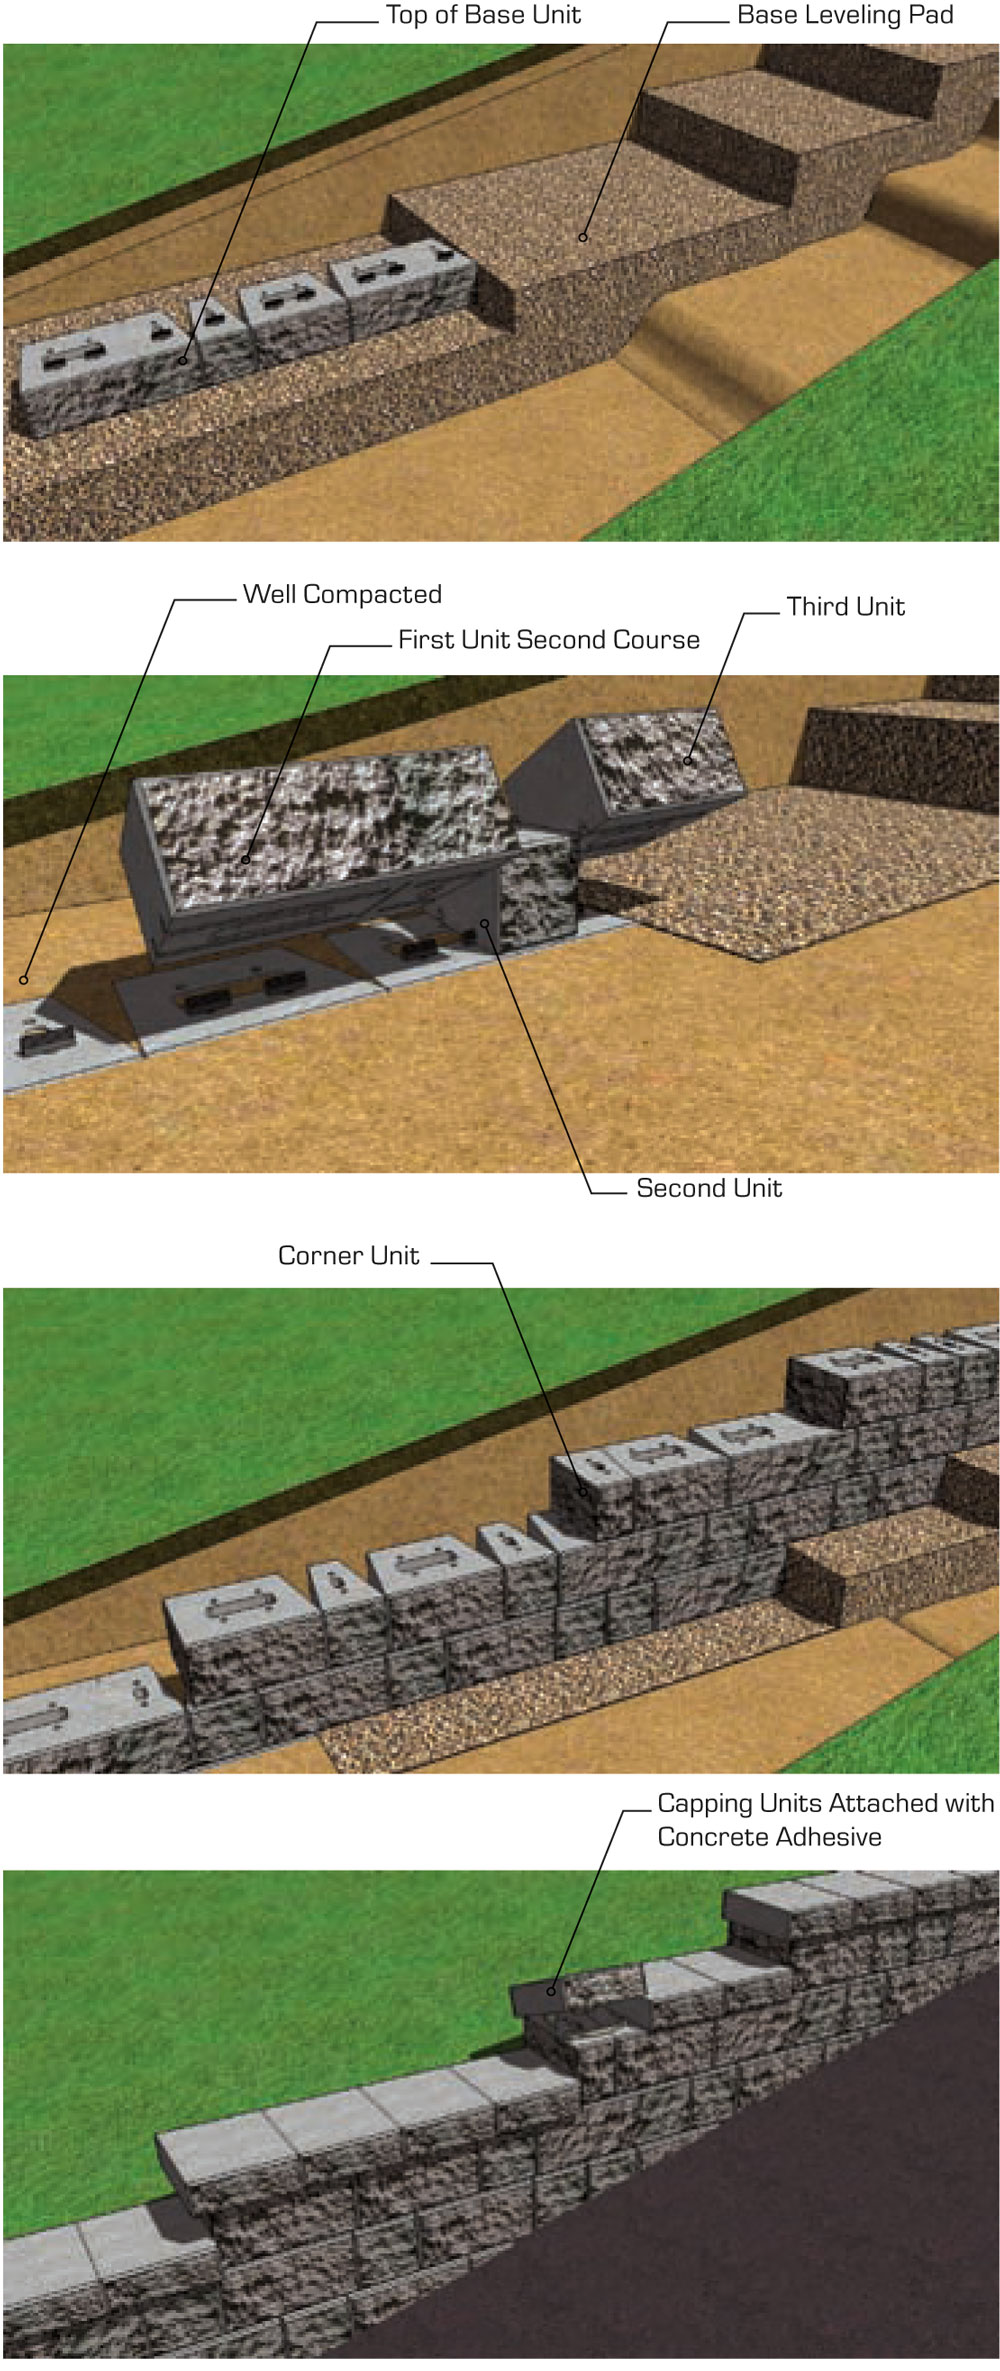
Step 1: Base Elevation Change
- The top of the installed base unit will be used to establish the step-up gravel leveling pad elevation
- Make sure to backfill and compact the gravel in and around the last unit of the first course
- Finished grade of the leveling pad should be an 1/8″ to 1/4″ above top of first course units to allow for a small amount of settlement
- Repeat the above screeding steps on the second elevation gravel
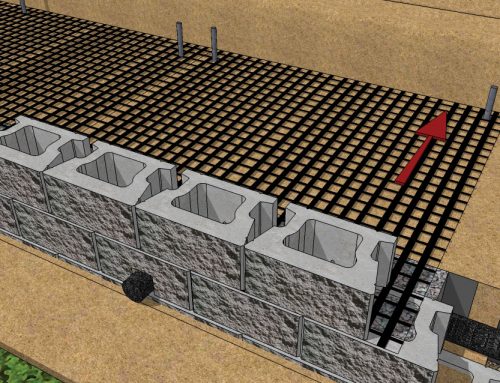
leveling pad - Place the first unit on the second course at a half bond on top of last and second last of the first course units
- The connectors in the lower units will fit into the connector slot of the upper units. To align the wall, place a string line at the back of the units for a straight wall or place a PVC pipe for a curved wall
- The connector holes of the second course can also be used for aligning units
- Pull upper unit forward to engage and
align units - The batter or set back will be 1/2”/unit (4.5 degrees or 1”/vertical foot) for a battered wall
- Place the second unit half on the last unit and half on the second gravel leveling pad
More StoneLedge Installation

How To Build StoneLedge StoneVista Pillars
Pillars add a finishing touch of elegance to any StoneLedge™ or StoneVista™ wall project. They can be used to create distinguished entrance ways to an [...]