Retaining wall corner installation details are often required for specific sites and can be specified by designers and engineers. Correct construction and professional completion of these wall details greatly enhances the visual appeal of the finished project and avoids the time and costs associated with improper installation. This document provides illustrated step-by-step instructions for building inside and outside corners.
CORNERSTONE 100 RETAINING WALL CORNER INSTALLATION
This guide can be used for CornerStone 100, MiraStone, FrogStone, Panomur
![]()
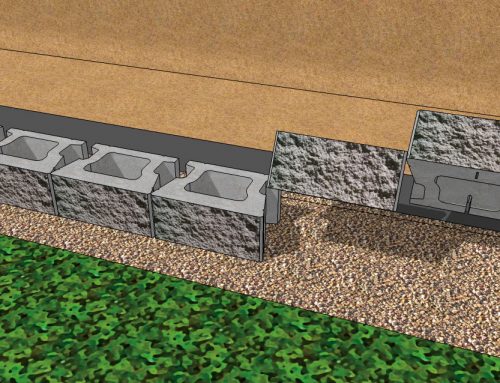
Retaining Wall Corner Installation | Outside Corner
- Use a 90° Retaining wall Corner unit to build an outside corner. Solid and hollow core may be used for installation process.
- Place the first 90° Corner unit on the base leveling pad to start the outside corner
- Place a CornerStone® unit on either side against the 90° Corner unit
- Continue to lay the CornerStone® base course on either side of the corner until first course is completed
- Flip and turn the second course 90° Corner overlapping the short side and half of the CornerStone® base unit. This unit should be pushed back 5/8″ to achieve proper setback
- Continue to lay the CornerStone® second course on either side of the corner until second course is completed
- The 90° Corners can be glued or concrete core filled to ensure a proper course to course outside corner interlock

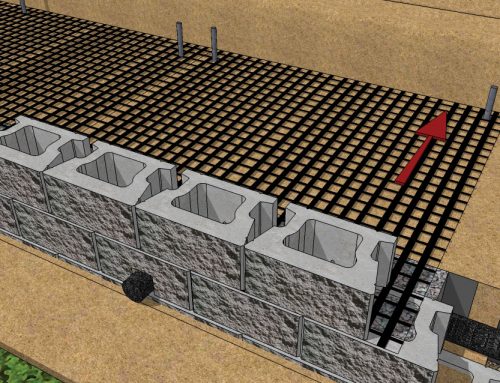
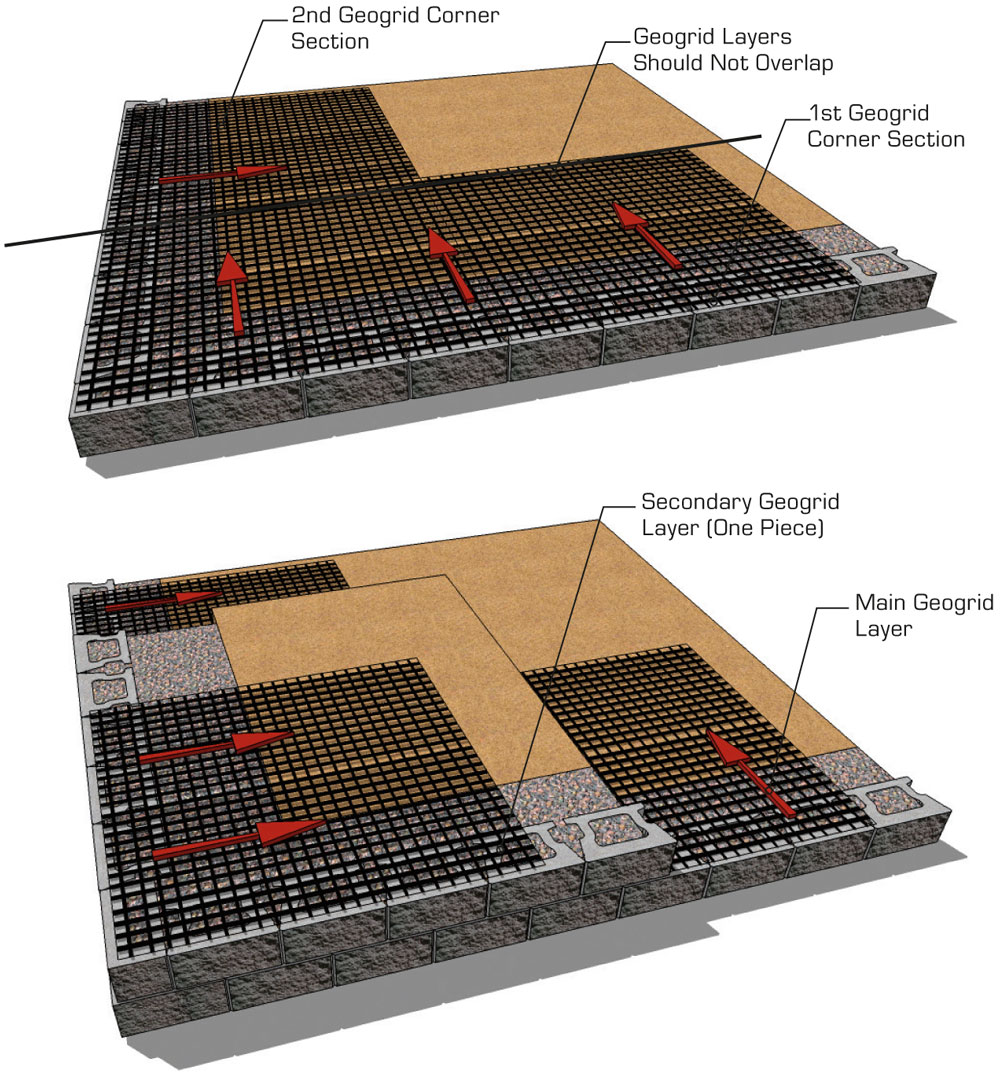
Retaining Wall Outside Corner Installation with Geogrid
- Each geogrid length should be laid perpendicularly to the wall face
- Geogrid should not overlap on the CornerStone® units
- Lay the 1st geogrid corner section perpendicularly to one side of the corner
- Lay the 2nd geogrid section perpendicularly to the other side of the corner but not overlapping the 1st geogrid section
- Lay the secondary geogrid layer one course above and perpendicular to the lower main geogrid layer directional strength
- Correct geogrid orientation, strength and length is crucial to the success of the wall project
![]()
Retaining Wall Corner Installation | Inside Corner
- Place the second unit at right angle and centered to the first CornerStone® base unit. Continue to install the CornerStone® base units right and left of the first inside corner units
- Place the second unit at right angle and centered to the 1st unit on the second course
- Make sure second course units are placed at a 5/8″ setback to the lower inside corner
- Continue to install the units left and right
of the inside corner to complete the second course of the wall - Repeat the above step by step installation until the wall height is completed or until reaching the first geogrid layer

Retaining Wall Inside Corner Installation with Geogrid
- Each geogrid length should be laid perpendicularly to the wall face
- Geogrid should not overlap on the CornerStone® units
- Lay the 1st geogrid corner section perpendicularly to one side of the corner and overlap h/4 through the backfill (Height of Wall ÷ 4)
- Lay the 2nd geogrid section perpendicularly to the 1st geogrid
- Lay the second geogrid layer perpendicularly and overlap h/4 through the backfill opposite to the first geogrid layer
- The h/4 overlap will alternate layer to layer to properly secure the inside corner
- Correct geogrid orientation, strength and length is crucial to the success of the wall project

More CornerStone 100 Installation
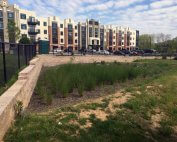
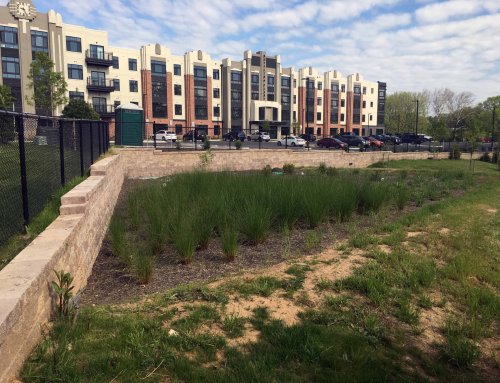
Bioretention Retaining Walls at Bottling Plant Apartments
Location Frederick, MD, USA Total CornerStone Retaining Wall Blocks 6,288 sq. ft. (584 sq. m.) CornerStone Manufacturer York Building Produ [...]
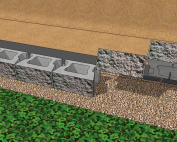
CornerStone 100 Gravity Retaining Wall Installation
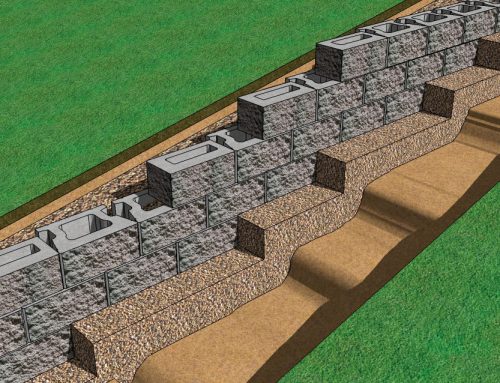
Gravity (SRW) Cornerstone retaining wall systems are structures lower in height that use the CornerStone® unit weight combined with gravel core infill [...]

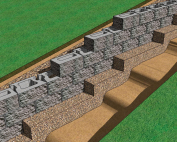
CornerStone 100 Geogrid Wall
Creating a CornerStone® reinforced retaining wall system, involves the use of geogrids for reinforcement. Cornerstone geogrid retaining walls 3.5ft (1 [...]
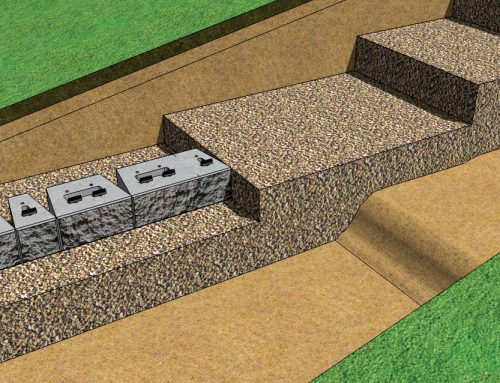
CornerStone Retaining Wall Block Base Elevation Change
CornerStone Retaining Wall Block Installation For Base Elevation Change are often required and can be problematic if not planned properly. Correct con [...]
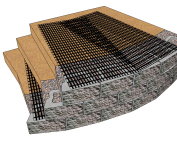
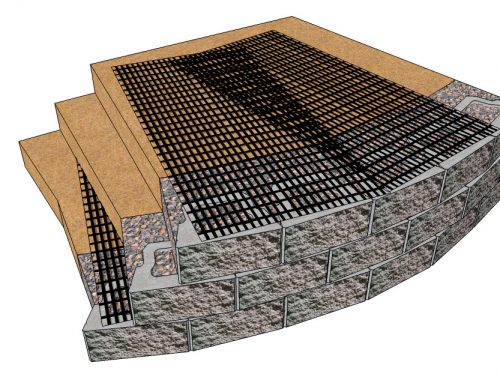
Retaining Wall Curve CornerStone 100
Retaining Wall Curve details are often required for specific sites and can be specified by designers and engineers. Correct construction and professio [...]
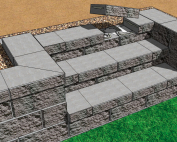
CornerStone 100 Stairs
Are you looking to create a visually striking and unique set of stairs in a wall project? Look no further than CornerStone® 100 stairs. These stairs a [...]
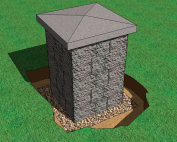
CornerStone 100 Pillars
Pillars add a finishing touch of elegance to any CornerStone® wall project. They can be used to create distinguished entranceways to any residence or [...]