Gravity (SRW) Cornerstone retaining wall systems are structures lower in height that use the CornerStone® unit weight combined with gravel core infill to resist earth pressures behind and on top of the wall. The 5/8″/unit (4.5 degree or 1″/vertical foot) batter or setback of the CornerStone® retaining wall along with proper soil conditions below and behind the wall provide the stability of the structure. Below is a step by step for CornerStone 100 Gravity Retaining Wall Installation. For walls 4.0ft (1.2m) and taller a qualified engineer should be consulted.
CornerStone 100 Gravity Retaining Wall Installation
This guide can be used for CornerStone 100, MiraStone, FrogStone, Panomur
![]()
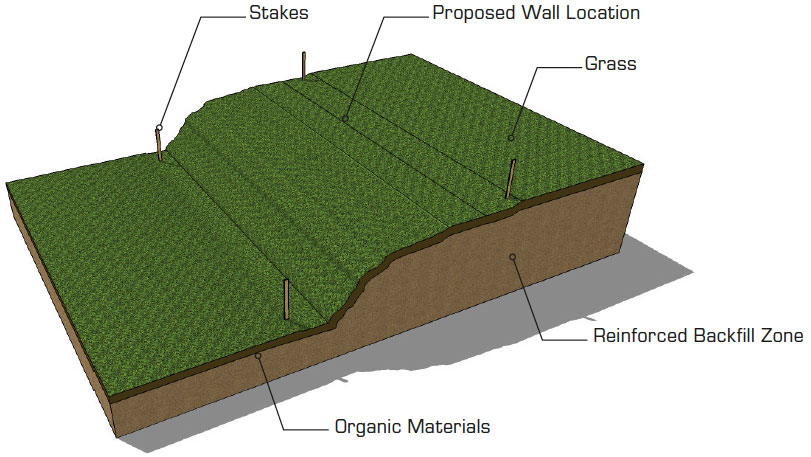
Step 1: Planning Your Retaining Wall Project
- Call before you dig & contact local authorities or city planning to ensure you follow proper guidlines
- Mark the bottom and top of the retaining wall excavation location with spray paint or stakes
- Establish proper elevation bottom and top of wall before excavating
- Organic Materials should not be used in Structural Backfill Zone
- Store and protect Structural Backfill Materials from inclement weather during construction
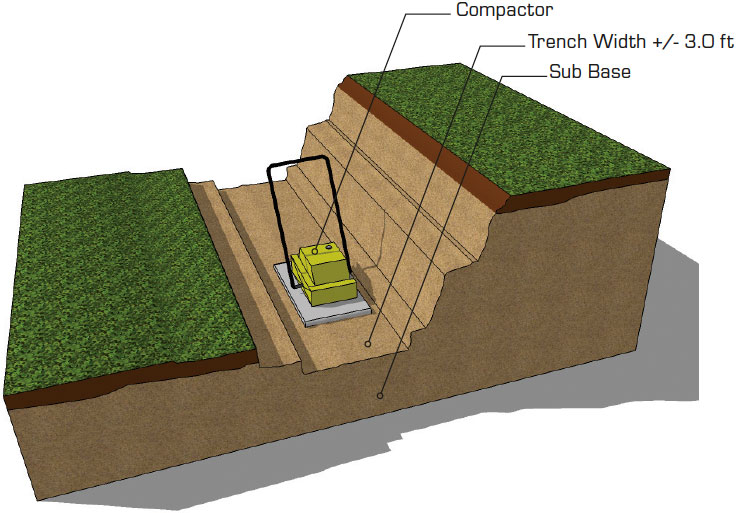
Step 2: Excavation
- Excavate and prepare Sub Base Levelling Pad Trench 6″ below first course
- Leveling Pad trench is approximately 2.5′ to 3′ wide
- Normal wall Burial Depth or Embedment Depth is 6″ to 12″ or one block
- Excavate cut line to a 2 to 1 slope or greater
- Back of wall excavation depth into the bank should be 12″ beyond the back of the Sub Base Levelling Trench

Step 3: Sub Base Compaction
- Compact Sub Base to 95% Standard Proctor Density or greater
- Remove any Organic or poor soils in the Sub Base and replace with proper Structural Fill Materials before compacting
Step 4: Base Stabilization
- (Optional) place 5′ to 6′ wide Base Stabilization Fabric on top of leveling pad trench
- Base Stabilization Fabrics will help prevent sub base materials from mixing with the gravel base leveling pad during compaction
- Fabric also provides extra Structural Bearing Stability to the base leveling pad

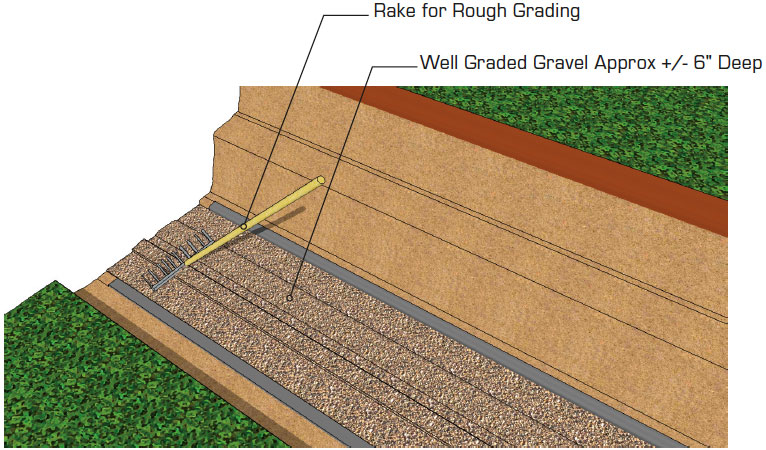
Step 5: Rough Leveling Pad
- Place Well Graded Gravel (also known as Road Base Aggregates) on top of fabric in the leveling pad trench approximately 6″ deep
- Rough grade gravel with a rake close to finish base elevation
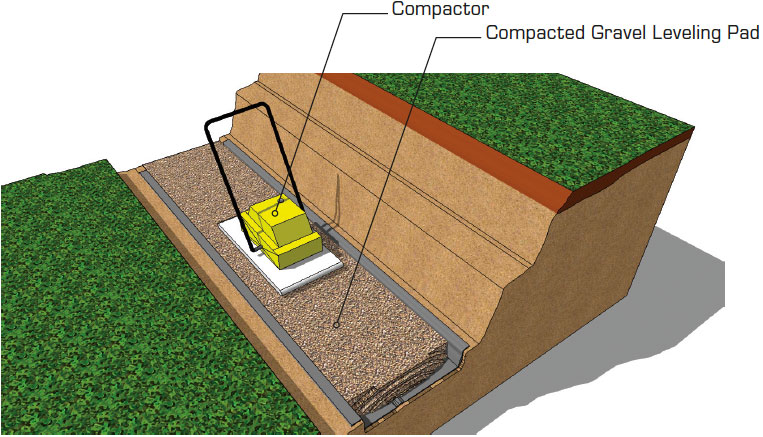
Step 6: Compact Leveling Pad
- Compact the Gravel Leveling Pad to 95% Standard Proctor Density or greater
- Correct Moisture Content in the gravel will
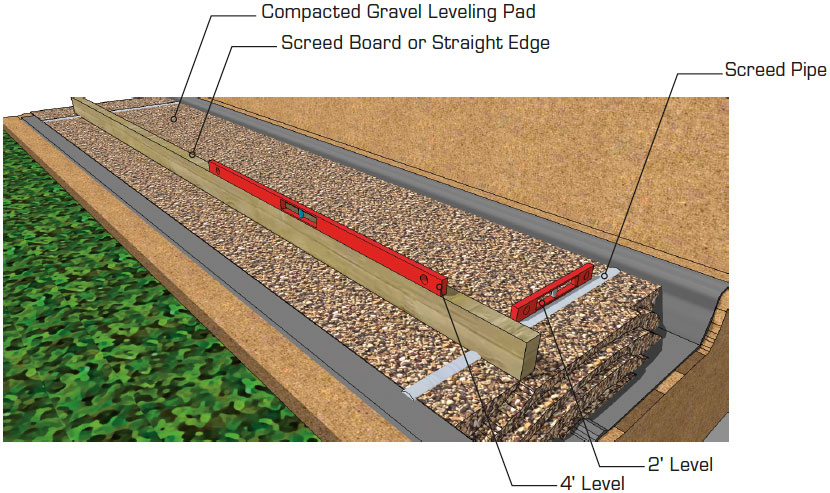
Step 7: Level Screed Pipes
- Place first 3′ long Screed Pipe across the trench at one end of the wall or at the lowest elevation
- Scratch a trench for the pipe in the compacted gravel with a chipping hammer
- Use a 2′ level or Laser Level to set the screed pipe to the proper level
- Gravel is added underneath and around the screed pipe to support while leveling
- Place the second screed pipe across the trench approximately 9′ from the first screed pipe
- Level the second screed pipe to the same elevation as the first screed pipe by using a 4′ level on top of a Screed Board, Straight Edge or with a Laser Level
- Continue to place and level screed pipes the full length of the trench leveling pad or until reaching a base elevation change
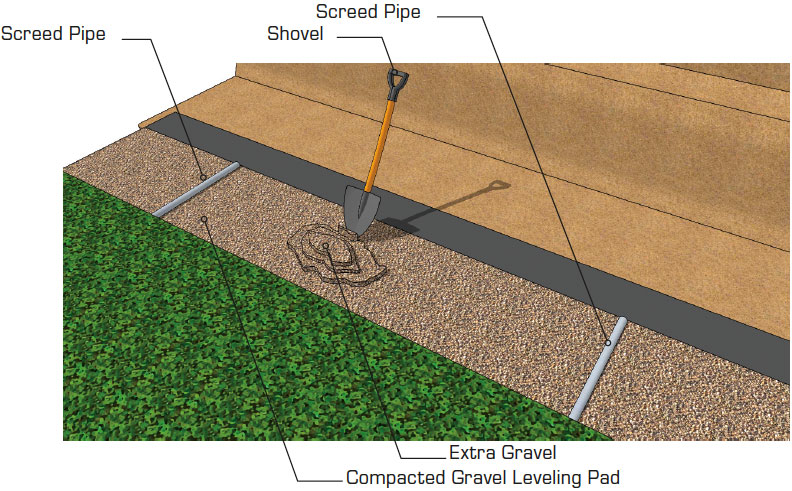
Step 8: Extra Gravel
- Place or remove extra Well Graded Gravel (also known as Road Base Aggregates) level to the top of the screed pipes as needed
- (If more than 1 . inches of loose gravel is added, repeat the compaction steps again
- before screeding)
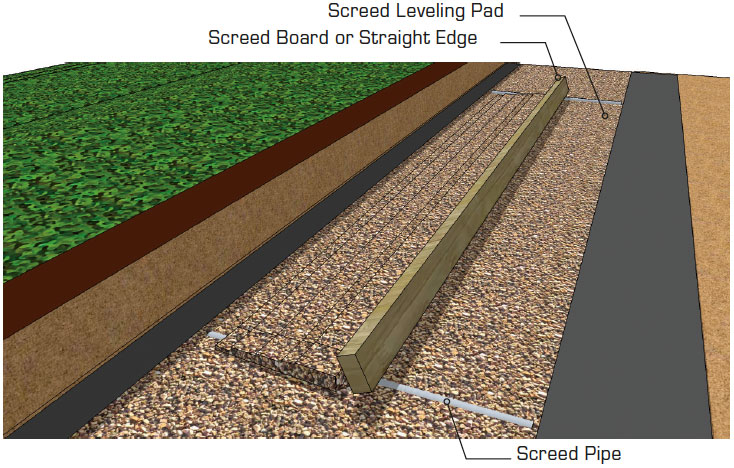
Step 9: Screeding Leveling Pad
- Screed the gravel leveling pad with a Screed Board or Straight Edge across the trench on top of two screed pipes
- The coarser the gravel the more back and forth the screeding action when drawing the Screed across the leveling pad
- Too much pressure on the screed straight edge may dislodge the level of the screed pipes while screeding
- A second screed pass may be needed to insure an accurate level has been achieved
- Continue to screed the leveling pad until completing the full length of the trench or up to the first elevation change
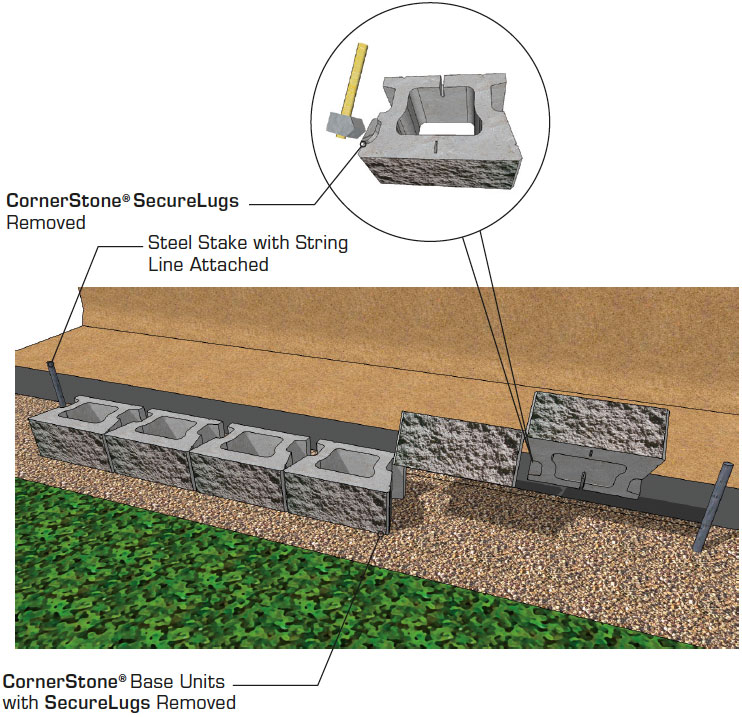
Step 10: Remove SecureLugs
- CornerStone® base units will have the SecureLugs removed before placing
- on the leveling pad
- Place each unit on top of the leveling pad in such a way as not to disturb the level gravel
Step 11: Lay First Course
- Remove the screed pipes from the leveling pad
- Place a steel stake or a CornerStone® unit at either end of the leveling pad to establish the back of the first course of units
- Secure tightly a string line to the stakes or CornerStone® units at either end which will provide the guide to line up the back of each CornerStone® base unit
- The distance of the string line between the steel stakes or CornerStone® units may vary due to heavy winds
Step 12: Level units
- Units are laid snug together and parallel to the straight or curved line
- A rubber mallet should be used if unit height and alignment adjustment is needed
- Use a short 2′ level to make sure the units are level front to back
- Use a 4′ level to make sure the units are level unit to unit along the length of the wall
- Correct batter and straight horizontal lines in the completed CornerStone. wall depend on the accuracy of the base leveling pad and units

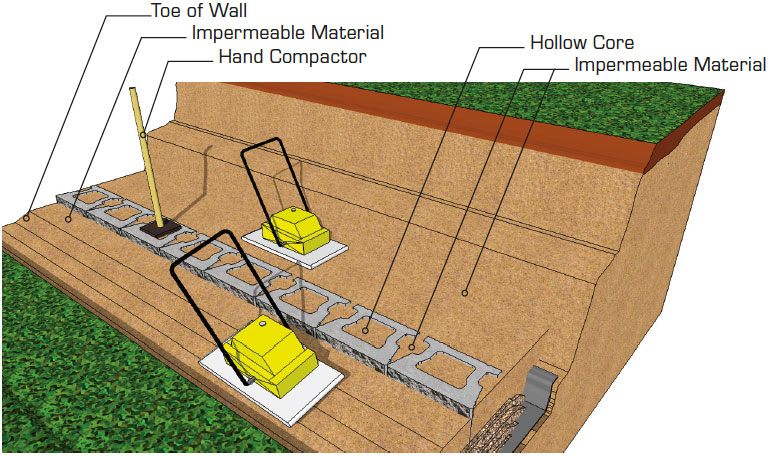
Step 13: Impermeable Fill
- . Backfill behind, in front (toe of wall) and in the hollow cores of the units with Impermeable Materials up to the desired level of the Perforated Drain Pipe or to the top of the first course
- . Compact the impermeable materials behind, in front and in the hollow cores of the units
- . Sweep the top of the units clean of all rock and dirt before placing the next course of units
- . Sweeping should create a 1⁄2″ void in the core to accommodate the SecureLug’s interlock
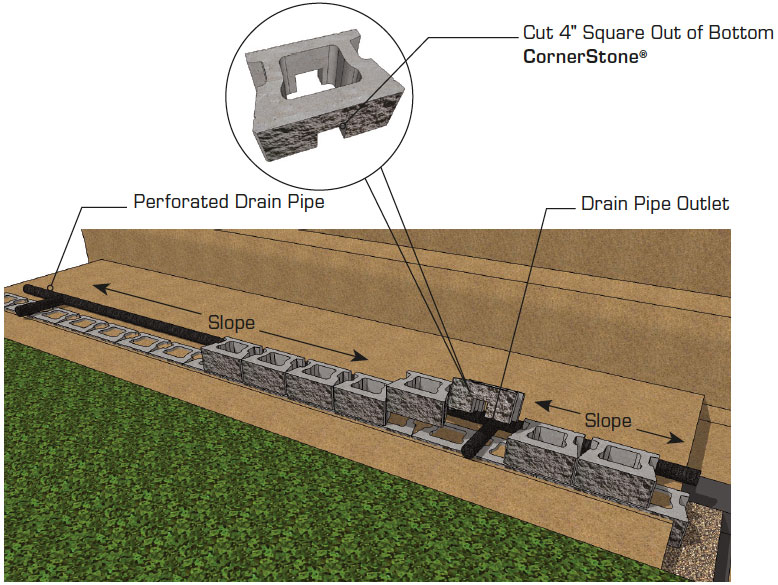
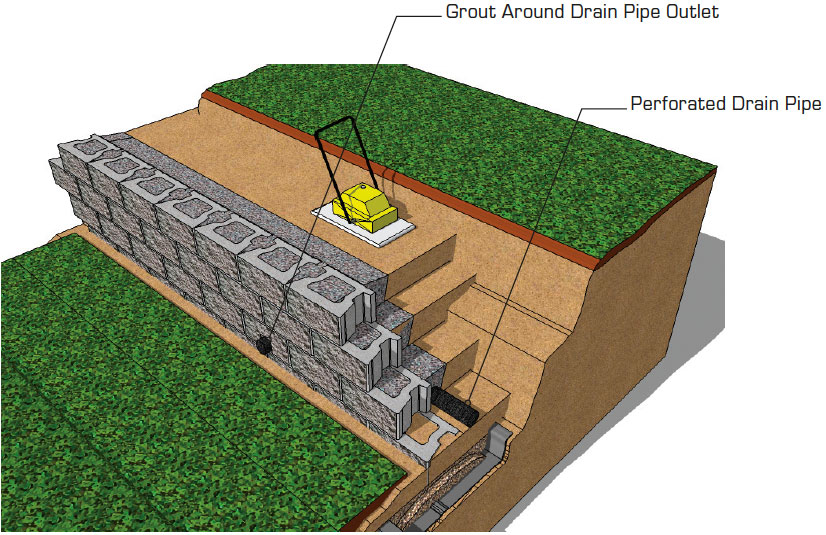
Step 14: Drain Pipe Outlet
- Perforated Drain Pipe should have adequate slope to drain water in the right direction towards each Drain Pipe Outlet
- Drain Pipe Outlet can be every 30 or 50 feet
- Perforated Drain Pipe can be a Sock Wrapped system to help prevent fines from migrating into the pipe
Step 15: Backfill
- Place and compact Backfill Materials in maximum Lifts of 8″
- Lifts may be less than 8″ depending on the type of soil or size of equipment
- Backfill materials will be placed 6″ to 12″ behind the units allowing for Clear Crush Drain Gravel (Angular Aggregates free of fines) between the CornerStone® units and compacted backfill materials By adding Clear Crush Drain Gravel (Angular Aggregate free of fines) after compaction of the backfills materials, this will prevent undue pressure against the wall which can cause the units to move outof alignment
- Each lift should be compacted to 95% Standard Proctor or greater
- The correct Moisture Content in the Backfill Materials will help in reaching proper Compaction Density

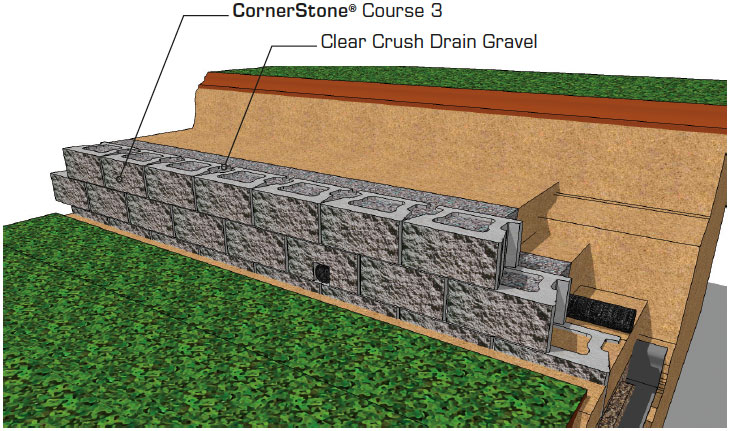
Step 16: Drainage Gravel
- Clear Crush Drain Gravel (Angular Aggregates free of fines) is placed in the hollow cores and 6″ to 12″ behind the wall units after compaction of the Backfill Materials. This will prevent undue pressure against the wall which can cause the units to move out of alignment
- Clear Crush Drain Gravel does not need to be compacted
- Sweep the top of the CornerStone. units clean of all rock and dirt before placing the next courses
- Make sure the Clear Crush Drain Gravel directly behind the wall units is placed flush to the top of the units
- Make sure the Backfill Materials are as well compacted and level as possible

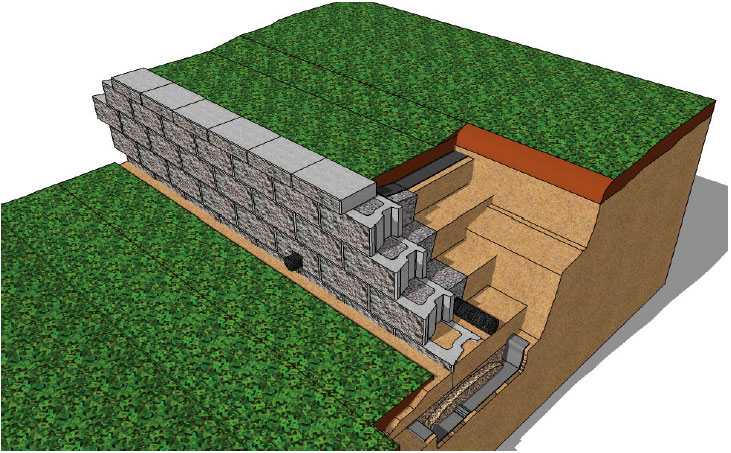
Step 17: Continue CornerStone 100 Gravity Retaining Wall Installation
- Continue to install each course of units following the same steps as above
- Install and compact Backfill Materials in 8″ lifts until wall is complete
- Grout around Drain Pipe Outlet to prevent Clear Crush Drain Gravel or Drainage Aggregates (Angular Aggregates free of fines) from migrating
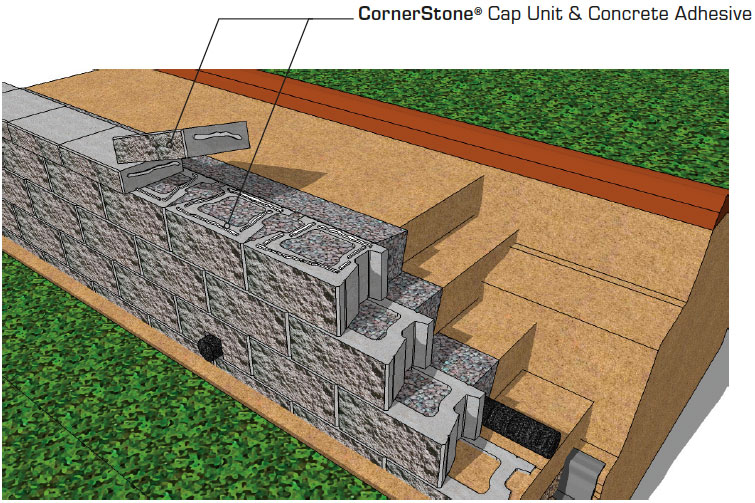
Step 18: Capping
- Complete the top of the wall with CornerStone. cap units
- Properly secure the cap units using a Concrete Adhesive
- Make sure all units are free of dirt and stones before installing the caps
- Place a solid bead of Concrete Adhesive around the top of each CornerStone. unit
- Place a bead of adhesive between each joint of the cap units
Step 19: Soil Separation Fabric
- Place a 6 ft wide Soil Separating Filter Fabric on top of the backfill and drainage gravel and against the back of the last units before placing the planting soils
- The fabric will prevent planting soil fines from staining the face of the wall and migrating into the Clear Crush Drain Gravel (Angular Aggregate free of fines)

Step 20: Final Grading
- Insure that final grading is done on top and bottom of the wall
- Make sure to protect newly placed planting soil from erosion during heavy rains or
More CornerStone 100 Installation

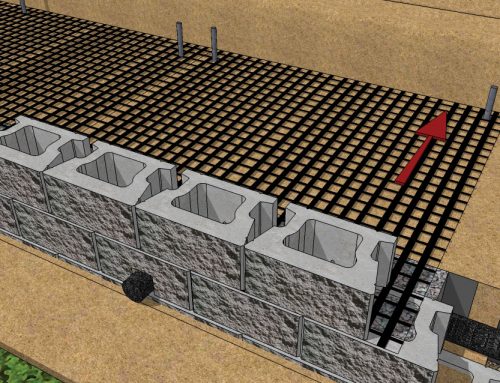
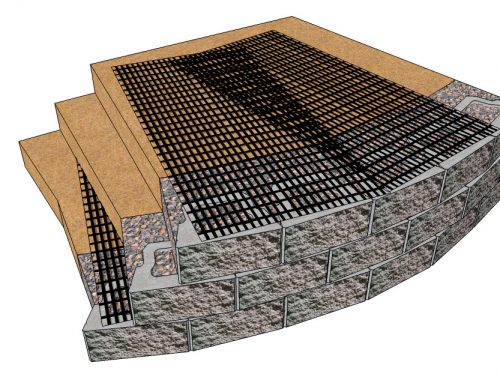
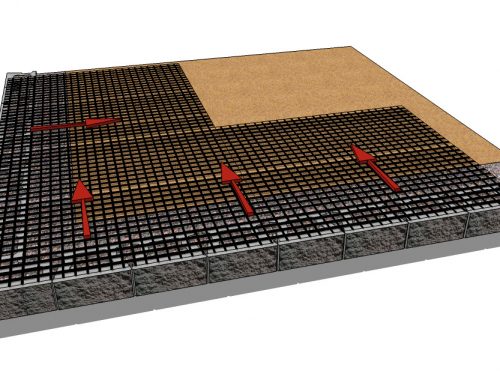
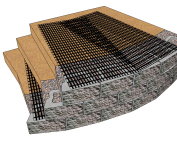
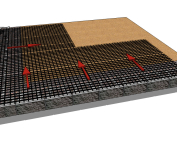
CornerStone 100 Geogrid Wall
Creating a CornerStone® reinforced retaining wall system, involves the use of geogrids for reinforcement. Cornerstone geogrid retaining walls 3.5ft (1 [...]
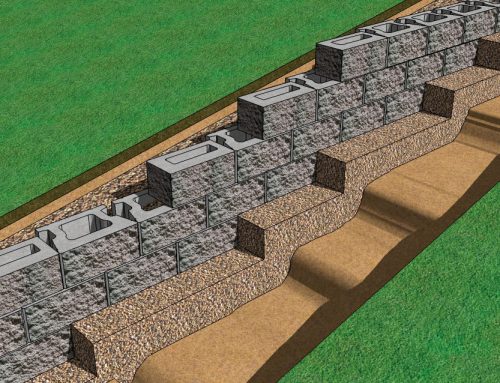
CornerStone Retaining Wall Block Base Elevation Change
CornerStone Retaining Wall Block Installation For Base Elevation Change are often required and can be problematic if not planned properly. Correct con [...]
Retaining Wall Curve CornerStone 100
Retaining Wall Curve details are often required for specific sites and can be specified by designers and engineers. Correct construction and professio [...]
Retaining Wall Corner Installation
Retaining wall corner installation details are often required for specific sites and can be specified by designers and engineers. Correct construction [...]
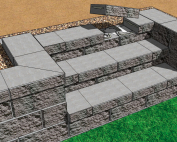
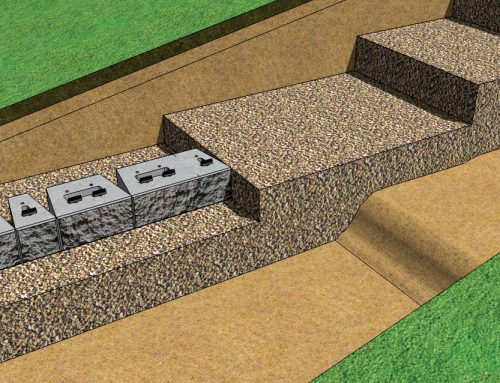
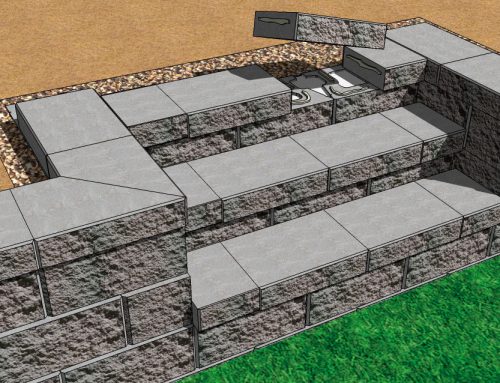
CornerStone 100 Stairs
Are you looking to create a visually striking and unique set of stairs in a wall project? Look no further than CornerStone® 100 stairs. These stairs a [...]
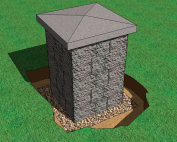
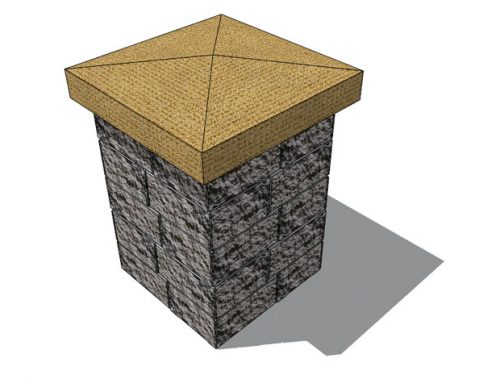
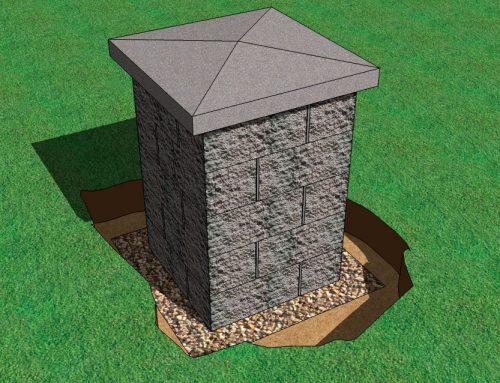
CornerStone 100 Pillars
Pillars add a finishing touch of elegance to any CornerStone® wall project. They can be used to create distinguished entranceways to any residence or [...]