Are you looking to create a visually striking and unique set of stairs in a wall project? Look no further than CornerStone® 100 stairs. These stairs are designed with features, such as a hollow core and SecureLug, making the installation process simple.
This section provides step-by-step instructions for using CornerStone® 100 to construct stair details. After reading this blog post, you will learn how to:
-
prepare the base leveling pad
-
lay the first, second, and third courses
-
fill the cores with concrete or gravel
-
add stair treads
-
create risers
-
and more
This guide can help anyone create beautiful and practical stairs for any wall systems.
![]()
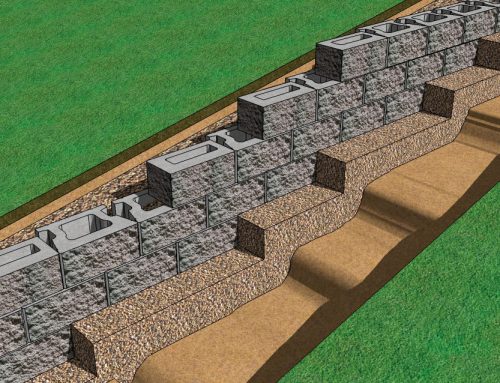
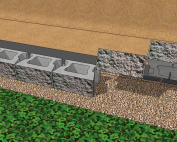
Step 1: Base Leveling Pad
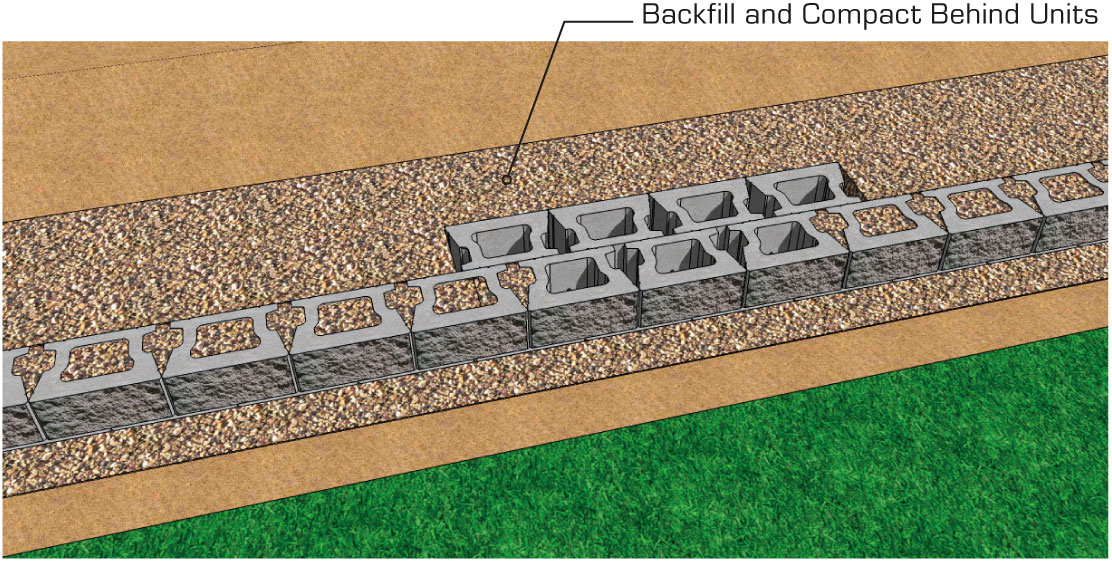
- When building steps, exercise the same care used in typical retaining wall design and construction.
- Prepare the sub-base and base leveling pad by following Gravity retaining wall CornerStone® Installation Steps 1 to 9.
- Build each step in sequence with each course of the regular retaining wall units for best results of wall to step interlock.
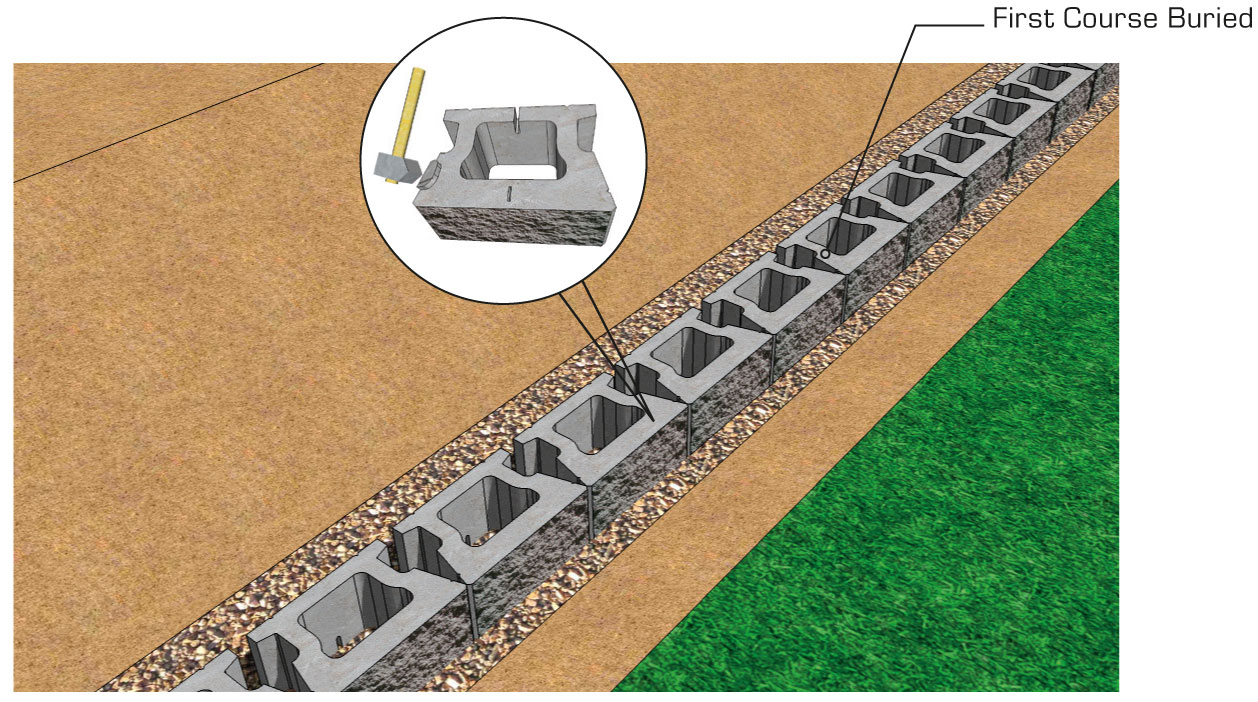
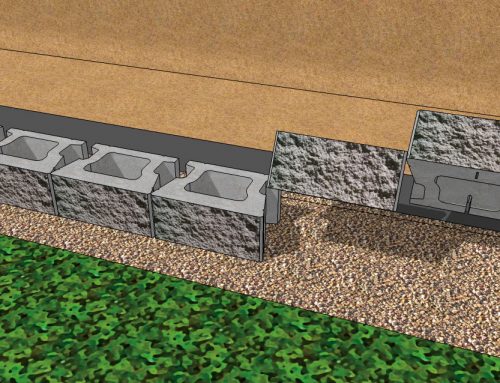
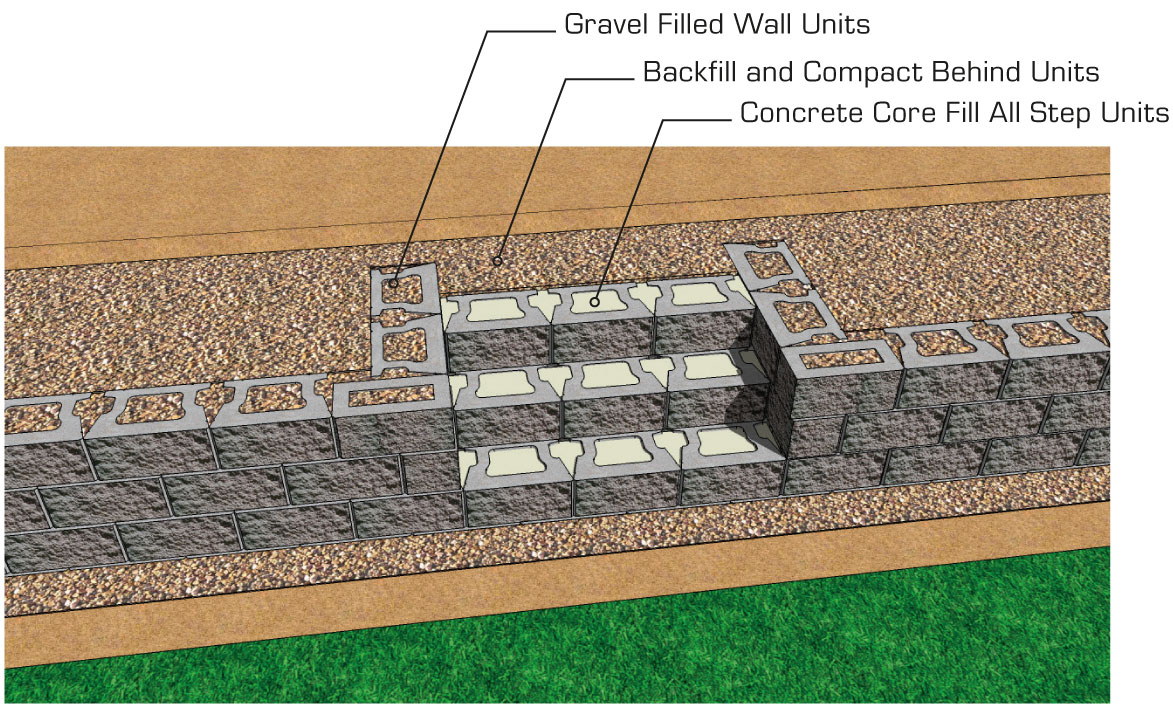
Step 2: Lay the First Course
- CornerStone® first base units will have the SecureLugs removed before placing on the leveling pad.
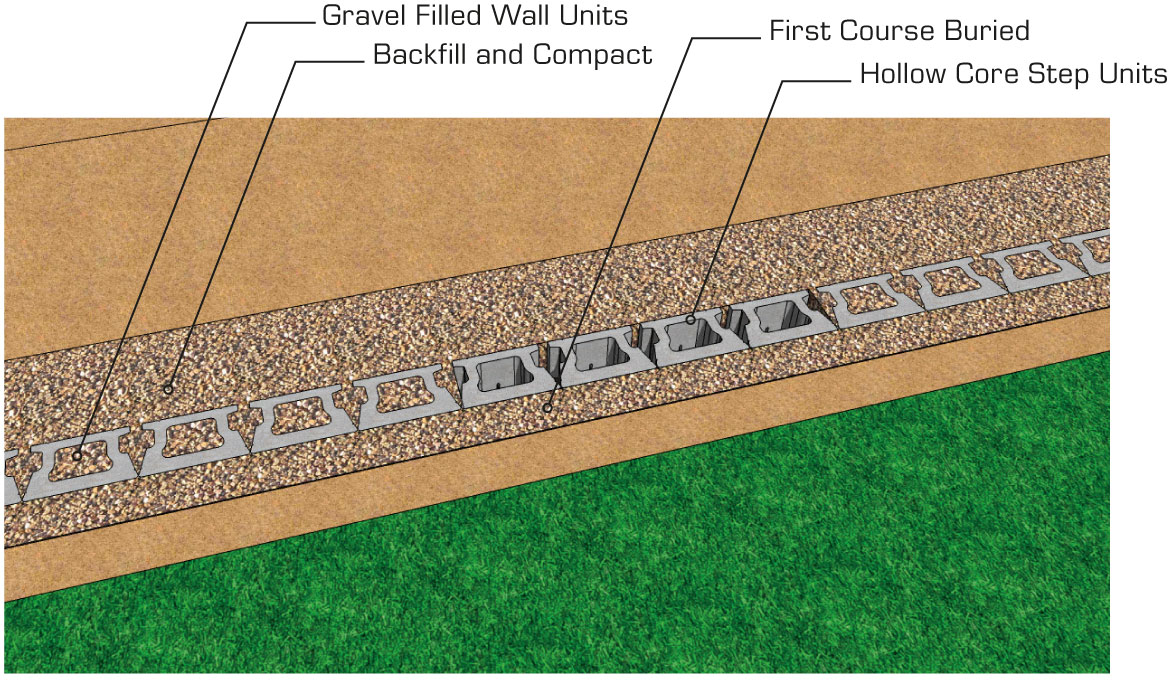
- The first course of step units will be completely buried.
- Backfill behind the first course units with gravel, then compact and level flush to the top of the first course.
- Do not fill the step units’ hollow cores with gravel if you plan to use concrete.
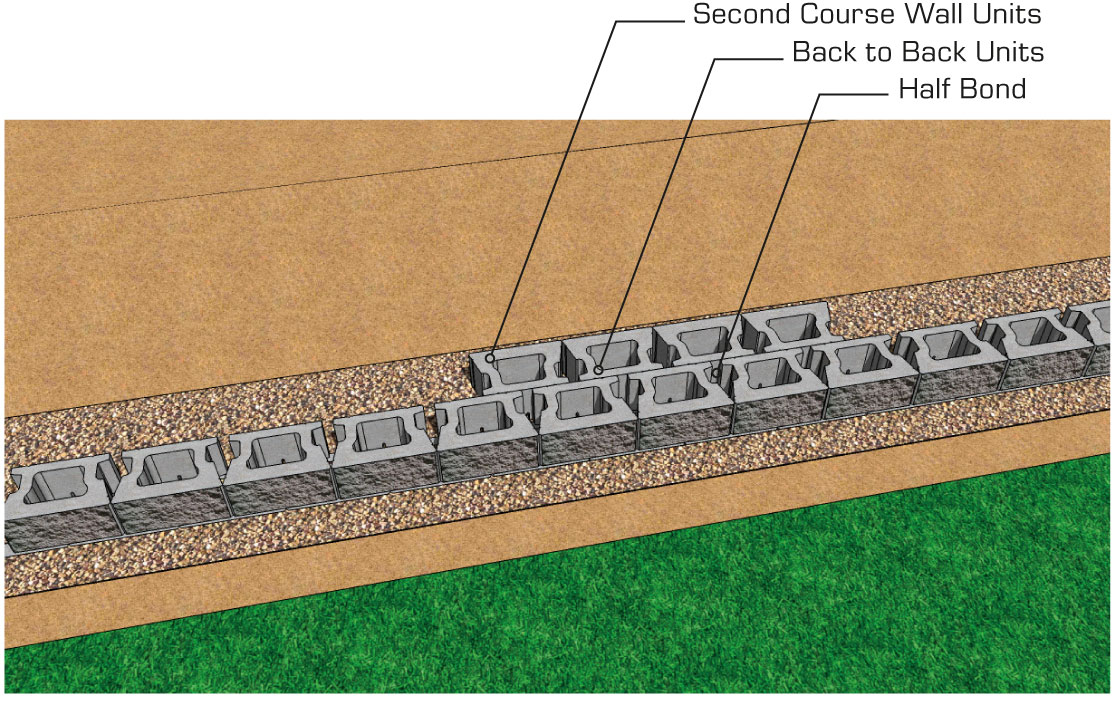
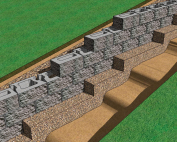
Step 3: Lay the Second Course
- Place the second course of units on top of the base units.
- Place a second row of units back-to-back behind the second course of units on
half bond. - Backfill behind the second course of units with gravel, then compact and level flush to
the top of the second course. - Do not fill the step units’ hollow cores with gravel if you plan to use concrete.
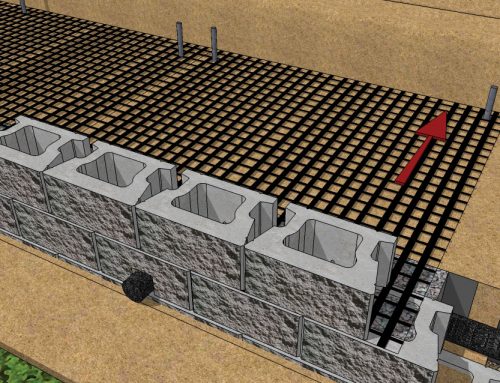
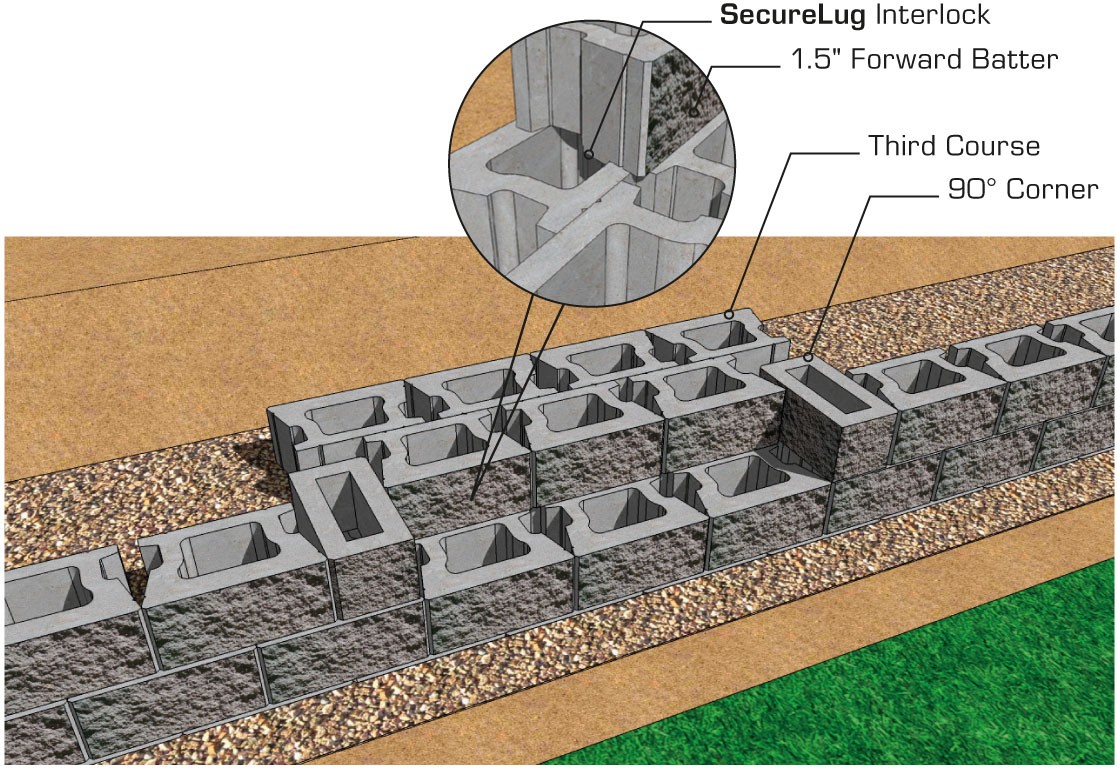
Step 4: Lay the Third Course
- Place the third course of units on the lower backward facing units with the SecureLugs placed into the 2 hollow cores of the lower units on half bond.
- Pull the units forward to lock the SecureLugs into the lower backward units.
- The third course units will be in a forward batter approximately 1.5 inch leaving 10.5 inches exposed on the front first step.
- Place a second row of units back to back behind the third course of units on half bond.
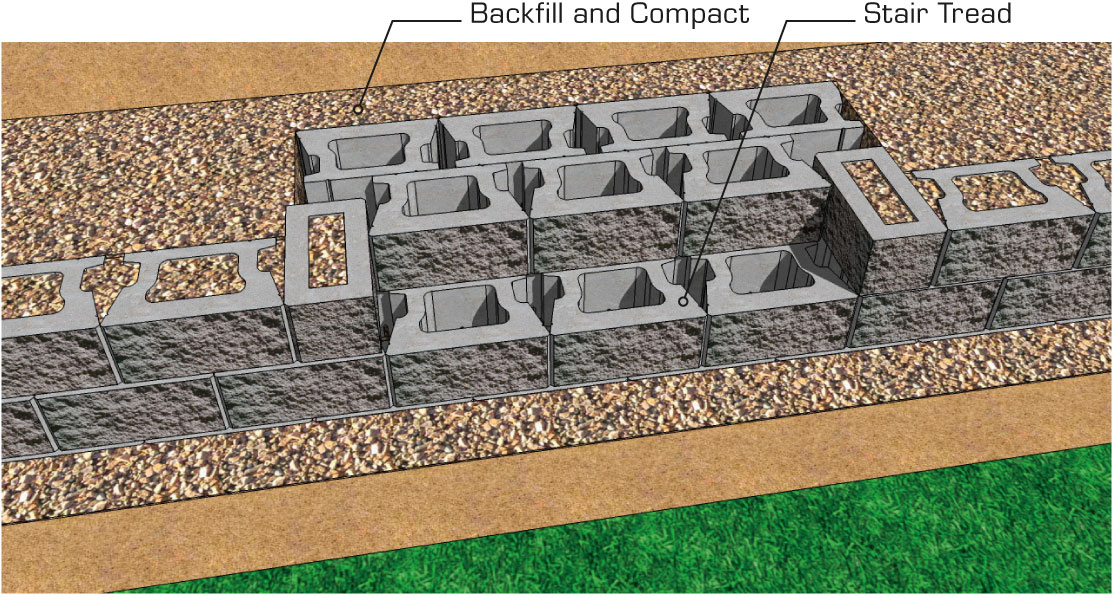
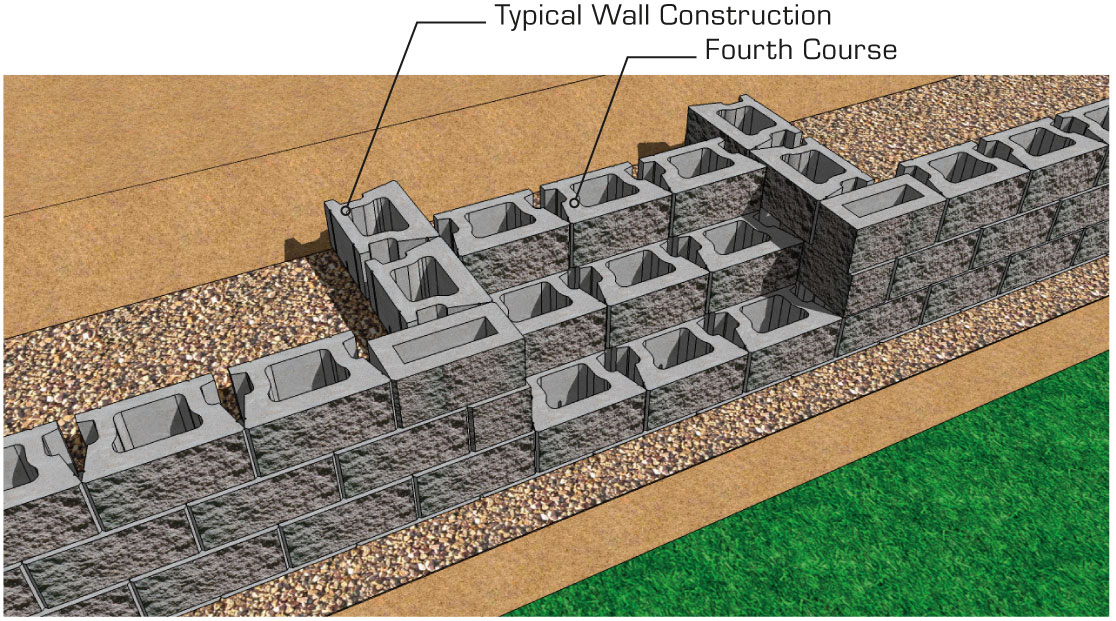
Step 5: Continue Installation
- Continue to install each course of step units following the same steps as above.
- The top and final step does not need backward units.
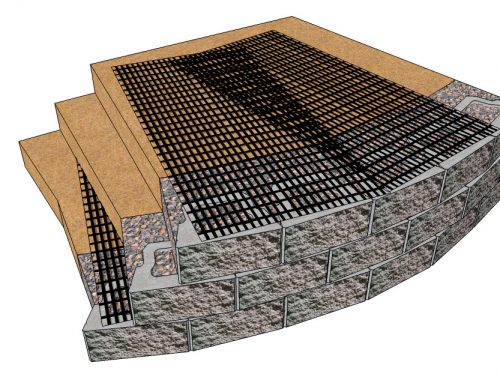
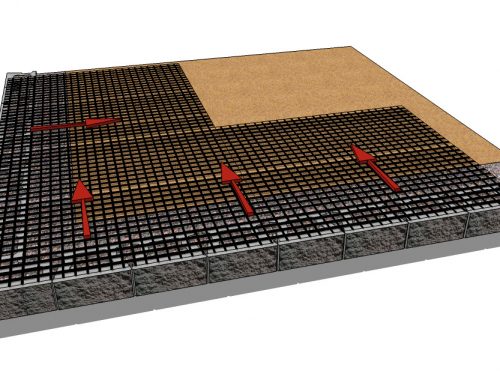
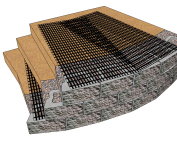
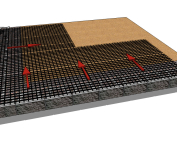
Step 6: Concrete Core Steps
- Concrete filling the cores of all the step units will provide for greater stair stability.
- Flush the concrete/gravel core infill to the top of the units.
- Use a steel bar to hand-vibrate the cores to insure proper filling.
- Option: Unit cores can be filled with gravel but must be well compacted.
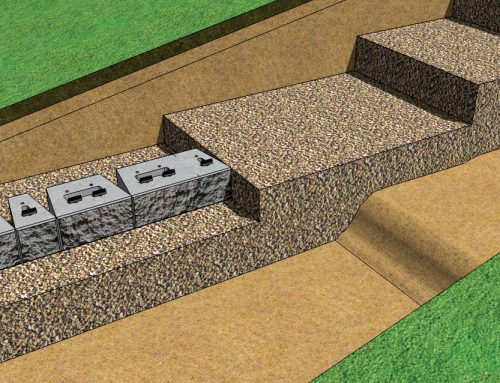
Step 7: Stair Threads
- CornerStone® 12-inch deep cap units can be used as a stair tread.
- Option: Pavers, Patio Slabs, or Natural Stone can also be used as a stair tread.
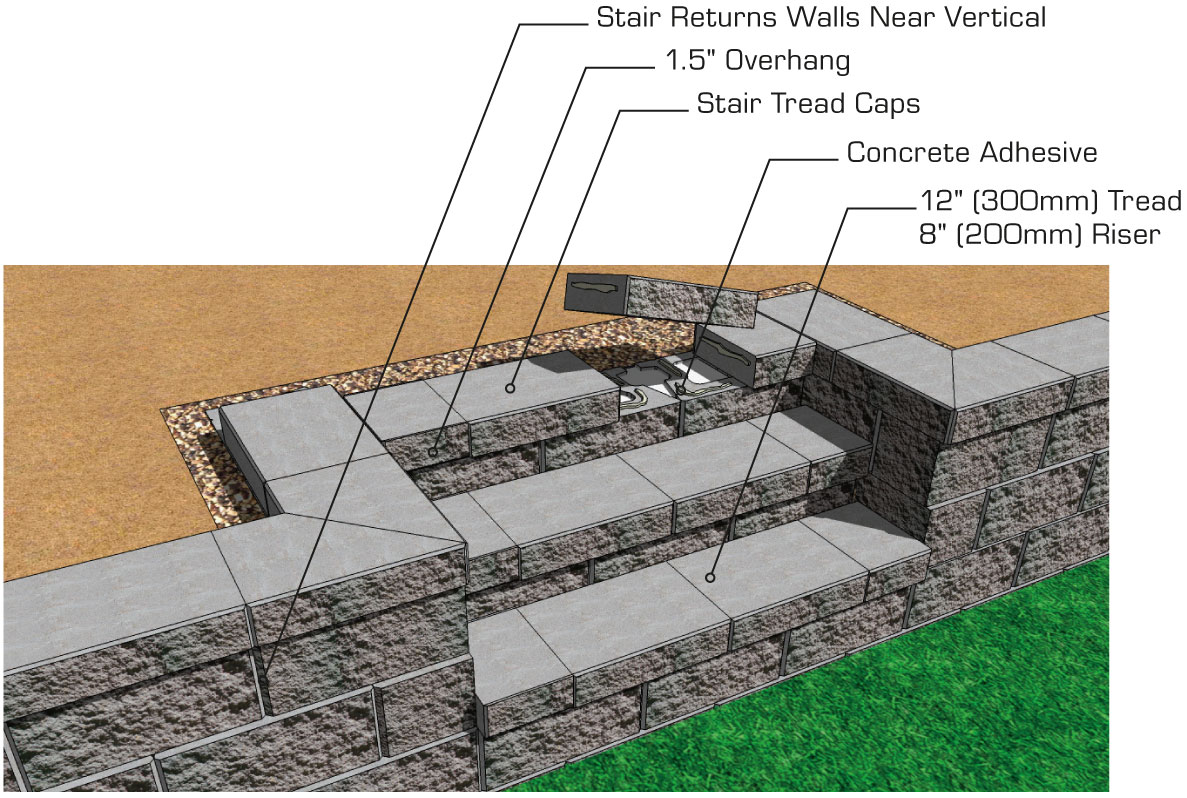
Step 8: 8″ Riser Cross Section
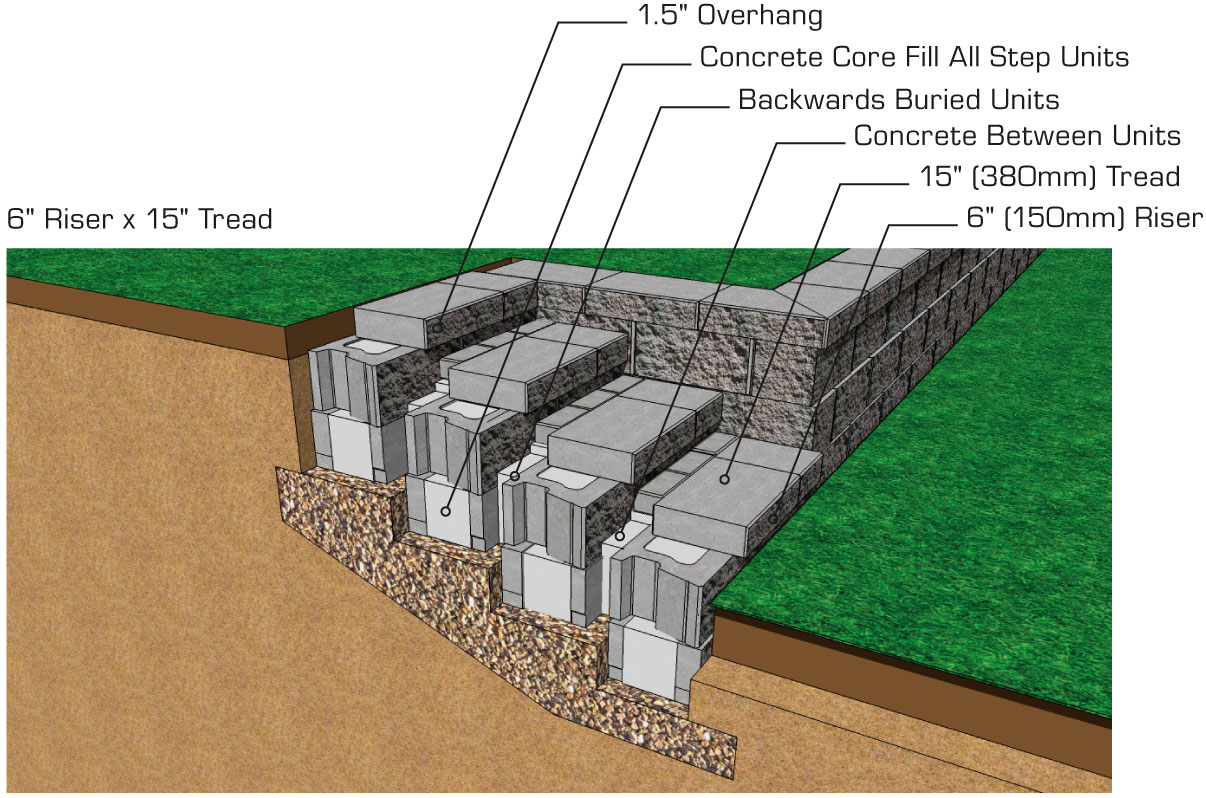
- The 12-inch cap will overhang the step units by approximately 1.5 inch on each step.
- The riser will be a full 8 inches using the above installation.
- Properly secure the cap units using a concrete adhesive.
- Make sure all units are free of dirt and stones before installing.
- Place a bead of adhesive between each joint of the caps.

Step 9: Lower Step Risers
- Lower risers can be made, such as 6″ or 7″, by lowering the buried units 1 to 2 inches below the top of the backward buried unit.
- Larger treads can be created by moving the buried units back off the forward step course 3 to 4 inches to create a 15 to 16 inch tread.
- A variety of riser heights and tread lengths can be created to suit your project.
Wrapping Up
Constructing a striking and functional set of stairs for your wall project has never been easier with CornerStone® 100 stairs. With the instructions above, you can spruce up your landscape and create a practical solution for accessing higher levels.
CornerStone® 100 stairs offer a wide range of options for customizing your stair treads. These include concrete caps, pavers, patio slabs, and natural stone.
The ability to customize the stair treads allows you to create a personalized look that matches your style and preferences. Additionally, using high-quality materials for the treads ensures that your stairs will be durable.
Using CornerStone® 100 stairs has several other advantages:
-
These stairs are designed with a hollow core, making them lightweight and easy to handle during installation.
-
The SecureLug feature ensures a secure interlocking connection between the step units and the wall system.
-
The use of concrete or gravel in the core of the step units provides added stability and durability.
By integrating these stairs into your wall systems, you can achieve a seamless and attractive design that will endure over time. Plus, it can potentially add value to your home.
More CornerStone 100 Installation
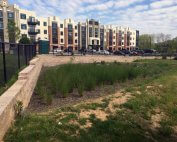
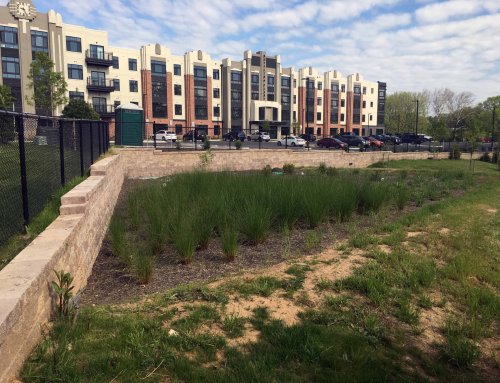
Bioretention Retaining Walls at Bottling Plant Apartments
Location Frederick, MD, USA Total CornerStone Retaining Wall Blocks 6,288 sq. ft. (584 sq. m.) CornerStone Manufacturer York Building Produ [...]
CornerStone 100 Gravity Retaining Wall Installation
Gravity (SRW) Cornerstone retaining wall systems are structures lower in height that use the CornerStone® unit weight combined with gravel core infill [...]

CornerStone 100 Geogrid Wall
Creating a CornerStone® reinforced retaining wall system, involves the use of geogrids for reinforcement. Cornerstone geogrid retaining walls 3.5ft (1 [...]
CornerStone Retaining Wall Block Base Elevation Change
CornerStone Retaining Wall Block Installation For Base Elevation Change are often required and can be problematic if not planned properly. Correct con [...]
Retaining Wall Curve CornerStone 100
Retaining Wall Curve details are often required for specific sites and can be specified by designers and engineers. Correct construction and professio [...]
Retaining Wall Corner Installation
Retaining wall corner installation details are often required for specific sites and can be specified by designers and engineers. Correct construction [...]
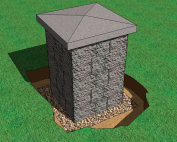
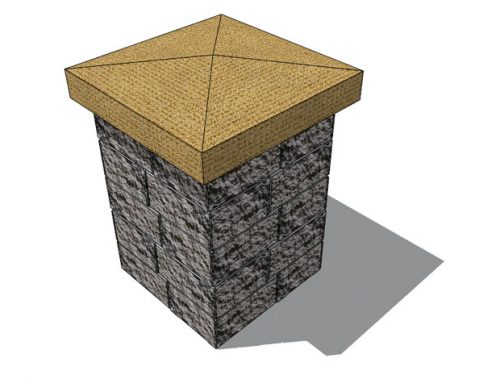
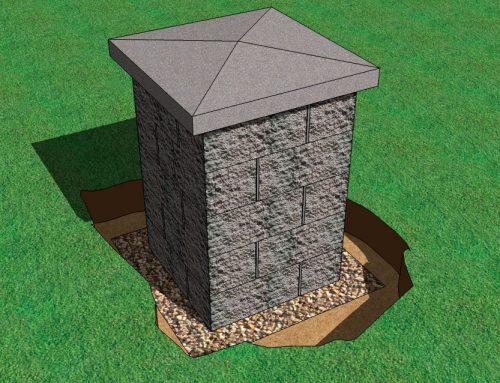
CornerStone 100 Pillars
Pillars add a finishing touch of elegance to any CornerStone® wall project. They can be used to create distinguished entranceways to any residence or [...]